Happy Tuesday! I have another tutorial for you. With Christmas fast approaching I'm starting my mass production of items I like to have on hand for teacher gifts, hostess gifts and/or friends who pop by over the Christmas season. Of course there ALWAYS seems to be someone on your list that you accidentally forget - the bus driver ... the UPS delivery man ... the gymnastics coach ...
Gift Card holders are becoming a "must have" in my bag of tricks these days. It is so much more personal to put a $10 Tim's card in a cute, handmade holder than the standard envelope that comes with the card. Here are the instructions to make this quick gift card holder.
Happy Crafting!
SUPPLIES REQUIRED:
· (1) piece of 11” x 4 ¼” strip of Whisper White card stock
· (1) piece of 4 ¼” x 3” piece of Real Red card stock
· (1) piece of 1” x 9” Basic Black card stock
· Scrap of Yoyo Yellow card stock
· ¾” square punch – retired – if you do not have this punch you can use your hobby blade
· 1 3/8” square punch
· Word Window Punch
· ¾” Circle punch
· Sticky Strip
Step 1: Score Whisper White card stock at 3”, 5 ½” and 8”:
Step 2: Turn sheet over and apply sticky strip as shown, making sure to place the adhesive as close to the edges as possible. If too much space is left there will not be enough room for your gift card to slide in.
Step 3: Tape together and use Word Window punch to punch out a slot on the seam.
Continue punching along the seam until the opening is wide enough for your gift card to fit.
Step 4: Use your ¾” circle punch to punch out a semi-circle in the middle and decorate if desired:
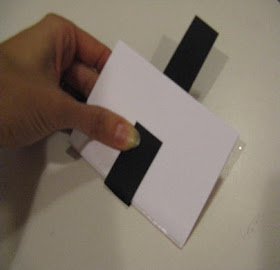
Step 5: Attach the red piece of card stock to the front of the holder then loosely wrap the black strip around the closed holder and secure it with sticky strip.
Step 6: Using your punches (and/or your hobby blade) punch out your belt, attach it to the black strip and you are done!


like the tutorial..steps make it easy to do..thanks for it i might need it when design Gift Card envelopes.
ReplyDelete