I've said it before, I'll say it again … I. LOVE. MONDAYS.!!!! Today was an AWESOME day! I had NOTHING on the calendar which meant the day was my oyster :) I took the kids to school (who got up on the right side of the bed - woo hoo!), picked up a few groceries and then nailed my workout. I was a little worried it wouldn't go very well as I really tweaked my back Friday but … I was careful and nailed it! I. Felt. So. Good!!! I'm so much stronger in just 2 weeks of doing the videos. Did I post my profess here? No, I don't think I did. I've only lost about 1-2 pounds, but I've lost INCHES! 1.1" off each thigh, almost half an inch off my waist and over 3/4 of an inch off my butt. Woo Hoo!
Aside from the exercising the Weight Watchers is also going amazingly well. I have a new mentality. I'm not just eating and counting points, I'm eating to FUEL my body! I'm eating so ridiculously healthy I don't even recognize myself! Oh sure, I'm still having the odd cookie here and there but it's mainly yoghurt, berries, chia seeds, quinoa, edamame, fish, chicken and lots of fruit, veg and water. Seriously. I feel amazing!
Wow! Sorry about that! Spontaneous trumpet blowing there … and totally non-crafting related! (You're surprised? Is this your first time visiting my blog??!!)
SO! How about we get to one of my many projects?? These are the little treats I popped in my orders this month. They are little envelopes with a package of hot chocolate inside:
I made a variety of different envelopes but all were made using one pack of the new Retro Fresh DSP from the Occasions Mini ($13.50):
I made 24 treats. Each sheet of DSP make 2 envelopes - there are 12 sheets of DSP per packThe envelope is simply made using our Envelope Liner Framelits. Start with a 10" x 10" piece of DSP:
Fold it in half and place the largest framelit on your paper:
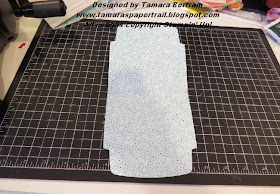
*** Notice that the fold line is JUST ABOVE the bottom of the framelit! You need to make sure the fold isn't any lower or the framelit will CUT the DSP along the fold … you don't want that - you want the envelope to be one piece. Here it is cut (with fold in tact) and unfolded:
When I made my first envelope I a) used some of the free Sweet Sorbet SAB DSP and b) folded down the top flap. To do that I simply scored just below the flap and folded it down:
OK - back to our project.
I used snail to tape the envelope together but then I stapled a strip of Coastal Cabana on the sides just to make sure it stayed closed. I used my 2 1/2" circle to punch out some Tangerine Tango and So Saffron circles, I stamped the "Thank You" in Soft Suede and then I added two small 1/2" circles (attached with glue dots) to hide the staples on the left. (The So Saffron circle hides the staple on the right). The sentiment is from the Simply Celebrate set in the mini. I think I cracked off all 24 in just over an hour. Perfect!
So that's it for today … think I'll go sort that last box of Barbie "stuff" in Rebecca's room. Pop in again soon to see some of the other things I have been working on. Until then …have a stampy night!
Tam


Love this - thanks!
ReplyDeleteThanks :) Luckily I had a stash of hot chocolate in my craft room. That's "normal", right?
Delete