Sunday, December 29, 2019

Modern Heart meets Strong & Beautiful

Happy Sunday!

It IS Sunday, isn't it??  I have lost ALL concept of what day it is! ... and it's wonderful!

I truly haven't been this relaxed in I don't know HOW long!  The kids have been off school since last Friday afternoon ... and so has Craig!  The kids have another week off and Craig is off until Thursday!  As much as the man drives me CRAZY with his constant moving (her seriously only ever sits still for about 5 minutes at a time) I am VERY grateful for his neurotic tendencies *lol*.  My house is never as clean as when he has lots of days off in a row!  I also gain at least an hour a day by him always taking care of dinner!  It seriously feels like I have SO much more time in the day just by not having to deal with that one task every day!

So what have I been doing?  Well ... Christmas prep had me busy right up until Wednesday, of course ... but since then I have been just "putzing".  Yes, it's generally work related but I'm doing what I WANT to do, not what I feel I HAVE to do .. and I'm loving it!  Catching up on paperwork, planning classes, organizing my craft cave ... just getting caught up and trying to breath!  I don't have much time to keep that up, though, as I have my New Catalogue Class this Friday night and my New Catalogue Open House Saturday morning! ... and there is always a lot I want to do for those.  I'm going to TRY not to get all crazy prepping, though.  I'm MUCH more fun when I'm relaxed!

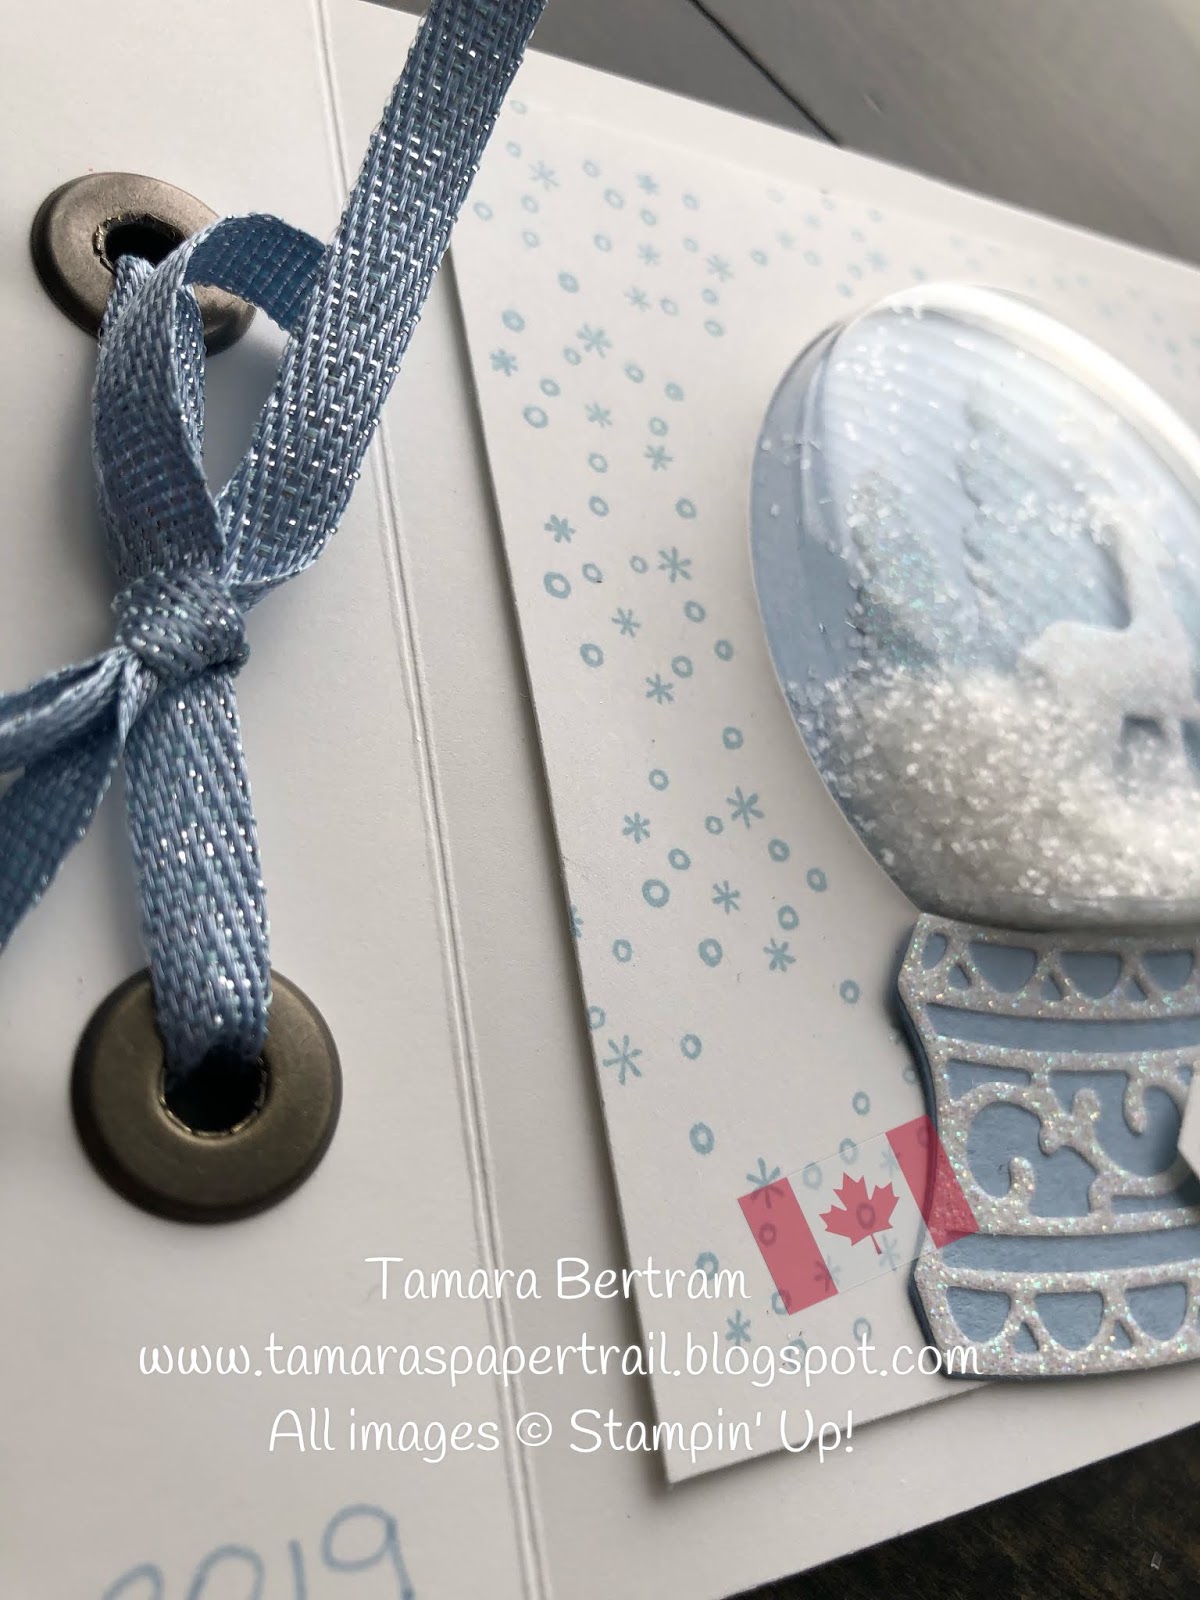
Today I'm going to share a project I made for a Canadian card swap I took part in.  It uses a new stamp set called "Forever Blossoms".  Trust me when I say this bundle is a MUST for you to own.  It makes quick and easy cards ... well ... quick and easy! ... but also stunning!  You CAN make it more complicated but you don't have to.  That's MY kind of set!  Check out what I made:
I just LOVE it!  I got a real muted, vintage look by stamping the image in Versamark then heat setting Gold embossing powder over it.  Heat embossing was my very first technique I ever tried and it's still my favourite, watching that powder melt!
To colour the images I used a fairly dry Aqua Painter.  I squeezed the closed Pear Pizazz and Blushing Bride ink pads really hard, to transfer a bit of ink into the closed lid.  I then used the aquapainter to paint the leaves and centres of the flowers.  An OLD aquapainter works well for this technique as the brush bristles give a feathers, realiztic look to the colouring, if that makes sense.
 I stamped the sentiment with Soft Sued ink and punched it out with my "Timeless Label" punch - and popped it up on dimensionals.
I added some Metallic Pearls for that finishing touch.  Love love love! 

I can't wait for the 2020 Occasions (Mini) Catalogue to go live January 3rd. This beautiful bundle (stamp set and dies) is $72.00 Canadian .... so when you purchase it you will also get a FREE Sale-a-bration item of your choice.  BONUS!

That's it for now - I'm off to finish off some projects I started MONTHS ago!  Whatever you get up to today, I hope it's a stampy one ... and I wish you all a very Happy New Year!


Tam

Thursday, December 26, 2019

Stampin' Creative Blog Hop - Sale-a-Brations 2020 Sneak Peek!

Happy Boxing Day!

What is one to do on Christmas morning whilst waiting for the family to wake up and start the fun?  Why write your blog post, of course!  lol.

Welcome to the final Stampin' Creative Blog Hop for 2019!  I'm Tamara Bertram, coming to you from Edmonton, Alberta, Canada.  I'm THRILLED to be hopping with so many AMAZING demonstrators from around the globe.  Truly an honour!

This month we are bringing you Sneak Peak projects from the upcoming 2020 Sale-a-brations promotion.  You don't have to wait much longer - January 3rd you can get SAB products FREE with EVERY $60 (Cdn) you spend.  Yes, you will want them all, especially after you see all the great projects we have to share with you.  So grab a pencil and paper, hop along and start that wish list for your next order!

I decided to showcase the AWESOME "Happy Birthday To You" set. 
This set is PERFECT for birthdays AND for weddings.  I came up with a layout I just LOVE and, as you can see, couldn't stop creating in a variety of colours ...
Fun, right??  Yes, I used SCISSORS to cut out the cake but it really wasn't bad at all, as the image is large and easy to maneuver around.

The coloured mats are 4 3/4" plus two ticks x 3 1/2" plus two ticks
The white top layer is 4 3/4" x 3 1/2"

On all Cards I used my 2 1/4" Circle Punch, run through the Scripty Embossing folder.  I popped the layers and the cakes up on dimensionals.

This card is in Soft Sea Foam and I used my Soft Sea Foam and Petal Pink Blends to colour the cake ... and adhesive backed sequins for bling.  The sentiment and cake are embossed in Silver Embossing Powder (EP).  This would be a great wedding card ... and you could change the colours to be whatever the wedding colours are.  Fun!

This card is in Gold.  I used my Gold Shimmer Paint and a QTip to colour the cake ... and Gold Faceted Gems for bling.  The sentiment and cake are embossed in Gold Embossing Powder.  Wouldn't this be a great card for a Golden Wedding Anniversary??
This card is in Purple Posy.  I used my Purple Posy and Soft Sea Foam Blends to colour the cake ... and Silver Metallic Pearls for bling.  The sentiment was stamped in Highland Heather ink, covered  with Clear Embossing Powder and then heat set.  This is a technique you can use to get an embossed image in ANY colour!  Just make sure you have a juicy ink pad so the EP stick to it ... then heat set!  The cake is embossed in Silver Embossing Powder.  On this card I had TRIED stamping the sentiment with my Purple Posy Ink and covering it with Clear EP but when I heated the powder the colour changed to blue!  Funky but not the look I was going for! lol
This card is in Seaside Spray.  I used my Seaside Spray and Soft Seafoam Blends to colour the cake.  The sentiment was stamped in Seaside Spray ink, covered in Clear EP and heat set.  The cake is embossed in Silver Embossing Powder and I used Silver Faceted Gems for bling.
This card is in Basic Black.  I used my White Frost Shimmer Mist and a QTip to colour the cake.  The sentiment was stamped in Memento Black ink, covered in Clear EP and heat set.  This is my preferred method to embossing a black image.  I find when I use the Black Embossing powder it always leaves little flecks of black on the card, despite using the embossing body.  My way of doing it gets the same great black embossed effect but without the flecks!  

The cake is embossed in Black Powder (flecks really weren't an issue as I cut the image out) and I used Silver Faceted Gems, made black with my dark Black Blend for bling.

So there you have it!  Five samples of one layout, one stamp set but varying colours and em embellishments.  This is my favourite SAB item this year and, as you can see, I have already used it a lot!  Starting January 3rd you can get this set for free with a minimum purchase.  I hope this has inspired you to get it!

Wishing you all a wonderful holiday season!  

Check out the rest of the SAB Sneak Peak projects my friends have created!

Tuesday, December 24, 2019

You've Got This Girl! - Kylie's Maui Achievers Blog Hop

Welcome to the Maui Achievers Blog Hop!  I'm Tamara Bertram, coming to you from Edmonton, Alberta, Canada.  I'm SO excited to he hopping with so many AMAZING demonstrators from around the glove as we bring you our projects this month!  Hopefully you will find some inspirations as you hop along.  Please leave comments for us as you go - it's always nice to hear what you think of our work.  Happy Hopping!

I have TWO cards to share today!  ... 10 hours LATE in posting, as I got my dates and times zones flipped with another hop I'm doing on Boxing Day but better late than never, I suppose!  It's funny that my card says "You've Got This, Girl" when in fact I do NOT have this *lol*

"Anything Current" is the theme and I was excited to play with non-Christmas sets!  I was pressed for time in creating them (little did I know I had already missed the deadline completely! lol) so I wanted to go with a simple, easy feel.  My eyes fell upon a FEW sets and I'm thrilled that they play nicely off each other.

My first one used two sets - the sentiment is from "Here's To Strong Women" and the splotch is from "Modern Heart".  I kept the colour palette simple, using just Whisper White, Basic Black and Bermuda Bay.  I love how it turned out:

 * Tip:  Whenever I want to keep things simple I turn to TEXTURE for interest.  On this card I heat embossed the sentiment in black, and the background is dry embossed with the Brick & Mortar Embossing folder.  You really don't need anything more!  Simple!

The next card I made . again uses the "Modern Heart" set and this time I paired it with "Strong and Beautiful" for the sentiment:


(Sorry for the lighting!  It's pretty dark at midnight over here in Canada! lol)

This layout is actually CASEd right out of our catalogue - I just changed the sentiment and colours.  I used Pretty Peacock, Blackberry Bliss and Highland Heather.  Again, I added texture by embossing the image and the sentiment and I used my snips to cut out the sentiment before popping it up on dimensionals.  I added a few Champagne Rhinestones for some bling.

There you are!  Two simple cards!  JUST what we need at this time of year - SIMPLE!

I would like to wish you all a very Merry Christmas and all the very best in the year ahead.  Enjoy hopping along with our other players!


Tam

Post Script:  My apologies - the link I need to join the blog hop is closed (how odd, given I'm only 11 hours late! lol).  If/when the link opens again I'll add the links to the other hoppers so you can hop along to check them out!


Sunday, December 15, 2019

Getting Close to the Finish Line!

Happy Sunday!

Wow!  I just popped in to my own blog and spotted I haven't posted since my Blog Hop Nov 28th.  Whaaaattttt??  While part of me is shocked it's been that long part of me is not at all!  The last few months have been an absolute BLUR and I'm still wondering where OCTOBER went, let along November and half of December!  9 days until Christmas??  Huh???  I have to say, until yesterday afternoon I have not had one ounce of Christmas spirit.  I've been listening to Christmas music on the radio and making Christmas projects but my heart just hasn't been "singing" the way it should (and usually does) all of December!  I'm happy to say that all changed yesterday afternoon ... as I mailed off my last "big project", which was 42 cards I made for a card swap.  Yes - that was the last "time sensitive" task on my to-do list, other than The Big Day itself.  Once that box was handed over to the postal lady I felt a HUGE weight lift and NOW I can relax.  NOW I can start figuring what I have ready for Christmas and what still needs to be done.  NOW I can do what I WANT to do, rather than what I HAVE to do.  NOW I can do crafts with the kids (check - worked on our model with Rebecca yesterday).  NOW I can watch movies with the family (check - watched Avengers End Game last night).  NOW I can be silly, wrap, sing, NAP, bake and be at the beck and call of the kids as they need rides here, there and everywhere and just BREATHE.  Oh how I love the next 10-11 days.  They are truly the ONLY days I relax all year long.  Oh sure, I'll do some work here and there, but nothing is a MUST ... and that is golden.

So rest assured I HAVE been crafting ... and made some FAB cards using the new Occasions and Sale-a-brations products I bought, but I can't share those until the end of December.  PLEASE pop over to my Facebook page "Tamara's Paper Trail" and follow me there.  I have been posting FABULOUS cards I have received from friends.  FB is my first stop for all things stamping.  Follow me there and you'll be in the loop!  Here are the cards I have posted there recently.  I have LOTS more to share so I hope to see you there.  In the meantime ... have a stampy day!

(Oh!  .. I see I have a few Blog hops coming up too!  Check back this Thursday for my next one!)

Tam


Thursday, November 28, 2019

Stampin' Creative Blog Hop - Deck the Halls

Happy Blog Hop Day!

Welcome to the Stampin' Creative Blog Hop for November, 2019.  I'm Tamara Bertram, coning to you from Edmonton, Alberta, Canada.  I'm THRILLED to be hopping with so many AMAZING demonstrators from around the globe (in fact MANY of them are ranking amongst the very TOP demonstrators in their country AND globally!!!).  This month we are bringing you projects with a "Deck the Halls" theme.  I hope you find some inspiration from my projects and from those along the hop.  Please don't be shy to leave comments as you go along.  We all love to read what others think of our creations.  Thanks you for popping in - happy hopping!

When I sat down to come up with a "Deck the Halls" themed project I immediately wanted to do Christmas ornaments.  The first Christmas I was a mom I started a new tradition.  I made a handmade ornament for my baby girl.  My dream was to one day have a tree that was covered in only handmade ornaments.  That dream is now a reality as ornaments have been made by me, the girls, my mom AND my dad.  Every year I enjoy coming up with something new.  Sometimes simple; sometimes complex but every year special.

My first ornament I'm sharing was RIDICULOUSLY quick and easy ... and so FUN, as I LOVE to colour!
I ordered these wood "wafers" or "slices" through Amazon.  I got 40 for $22.00. I simply stamped the image and sentiment (from the Brightly Gleaming stamp set) with Memento Black ink and then coloured them with my Real Red and Shaded Spruce Blends.  For a little sparkle I added some Wink of Stella.  I have seen other stampers "seal" the image by inking the wafer with Versamark and then covering it with clear embossing powder but I like these just the way they are so "naked" they stayed.

Next up I created a dome ornament using the Still Scenes bundle.  One side show the polar bears and the other the deer.  I see that I didn't secure the bears quite firmly enough, as the glitter must have gotten under the dimensionals and the bears are lifting.  If you try this make sure you press down on those little cuties!

Thirdly I made the skate from the Free Skate set into an ornament.  Notice the laces?  I coloured our White Bakers Twine with my dark Smoky Slate Blend marker.  I also use that blend to colour the blade of the skate.
Lastly, although this isn't an ornament I thought I'd throw it in as it, too, is a tradition that I have had for about as long as I have been a demonstrator.  Check this out ...

It is a "Wish List Booklet".  I make two every year for the girls.  They fill it out with everything the want for Christmas.  Of course, when they were young, I had them fill it out quite early in December to leave for "Santa" on Christmas Eve.  The last few years I'm lucky if I have them FINISHED by Christmas Eve *lol*.  ANYWAY ... on Christmas Day, after all the presents are open and everyone has wandered off to enjoy their morning I sit and write down in the back of the book everything they GOT, and from whom.  It's just a great little keepsake that they can look back on when they are older and see all the fun toys they wanted .. and got.  I will be posting detailed instructions on how to create these little books in a future post.


I hope you enjoyed my projects and got some inspiration.  If you need supplies to make any of these projects you can do so from my online store (if you are in Canada) by clicking the catalogue over on the sidebar.   If you have any questions feel free to leave a comment and I'll help you out!

Check out all the other posts from my friends ... and have a stampy day!

Tam

Sunday, November 24, 2019

This, That and The Other ....

Happy Sunday!

Long time no post!  I'm JUST about ready to come up for air.  November has been an EPIC busy month for my little family!  Of course I have my stamping empire to run and Oct/Nov are always my busiest time but add in my FIL going back into the hospital for some throat surgery and a dog who has been diagnosed with diabetes and it's busier than usual!  With a lot of support from my friends I'm MUCH more stable emotionally than I was earlier this week - not gunna lie I was a whole lotta hot mess!  Lack of sleep certainly didn't help and there were a few tears shed at not being able to get a blood sample from my fuzzy buddy's ear.  However!  Every day is a new day and our new routine is starting to settle in so life can calm down ... if even just a little bit!

Suffice it to say I haven't been able to create much these last few weeks.  My classes have been almost exclusively our awesome Countdown Calendar kit.  I have had 83 of these little cuties pass through my door this season.  They are SO quick to stamp and super easy to assemble.  I love seeing the variations from those who want to go "rogue" and do their own thing!


I also love how half the stampers numbered the boxes 1 through 25 sequentially whilst the other half put the numbers randomly, like we see on the calendars we find at the store.  So fun!

Hmmm - what else has gone on this month?  Oh!  I know!  I had my annual Christmas Stamp-a-Stack a few weeks ago!  These are the five designs we made ...
Quick and easy and ready for giving!  This one is one I haven't shared here before.  I had to tweak my original design because I didn't have enough of the designer paper for everyone to make as many as they wanted.  This layout allowed for that:
Punches make cards so much faster than die cuts!

Funny story from my Stamp-a-Stack and that card ... I could find the "Merry Christmas" stamp that's used.  It WAS on my desk but, when I was setting up around midnight the night before, I couldn't find it ANYWHERE!  I tore my craft cave apart, determined to find it.  I looked in every drawer, thinking it fell in.  I looked through all the stamp sets that had been on my desk ... every designer paper pack, every tool (thinking it got stuck to SOMETHING!) .. alas, no luck.  I had to call one of my downline who was coming to the event, and ask to borrow HER stamp.  About 10 minutes after the class ended I felt something under my shoe.  Low and behold ...
Hee hee.  Too funny!  It had been there the WHOLE time!  I hadn't felt it because I had been standing on carpet all day.  I only felt the bulge when I stood on the tile floor to clean up!  Poor little stamp.  It was mutilated pretty badly but I did manage to clean it up to be used another day. lol.

Here is a cute little project we made at my team Stampin' Social.  Our little pillow boxes decorated all pretty ... and CASEd right out of the holiday catalogue!
Our puff paint that is in the holiday catalogue makes this project lots of fun and adds some great interest and texture to the final project.

This week I also had my monthly volunteer night at the Robin Hood Association.  I needed some really quick, easy cards for my nine stampers.  Apparently soul crushing time pressure is just what I need to whip up quick and easy notecards because these three came together in less than an hour total!
The Merry & Bright card was CASEd from a fellow demonstrator over at www.paperdaisycrafting.co.uk.  I just LOVED the colours she used.  I took her idea and cut it down to work on our notecards.


That brings us to the BEST weekend of the month ... our On Stage event - Stampin' Up!'s local conference event.  As always we walked away with lots of smiles, hugs and free product!  It was an exhausting but AWESOME day :)


 I THINK that brings us up to date ... but don't quote me!  It HAS been a whirlwind of activity and I'm just hanging on by my fingertips!  I have a few more classes coming down the pipe but they are repeats of what I have already done so nothing TOO stressful.  I DO need to create for my bloghop that is this week and of course I need to start getting ready for Trixie and the gang coming to town Dec 1 (my Elf on the Shelf for those of you who are new to my blog) so LOTS of fun still to come this year.  Before ANY of that happens, though, I need to stroll my pup so off I go to start my day.  Whatever YOU get up to today I hope you have a stampy one!  Thanks for popping in :)


Tam