Tuesday, June 30, 2020

PRIDE 2020 BLOG HOP


Happy Tuesday!  Tamara Bertram coming to you from Edmonton, Alberta, Canada.  Thanks for popping in!  I can't BELIEVE it's the end of JUNE already ... and also the end of PRIDE month, which is the theme of our hop today.  Demonstrators from around the globe are sharing with you our "Pride Theme" projects. We hope you enjoy them and can get some inspiration!

MY project came together REALLY quickly!  We currently carry a GORGEOUS Rainbow Glimmer Paper.  It's SO easy to just STAMP on the paper, cut it out and BAM!  Done!

The key to success for stamping on glimmer paper is the Stamparatus!  Dust that bad boy off - it's your best friend for THIS card!

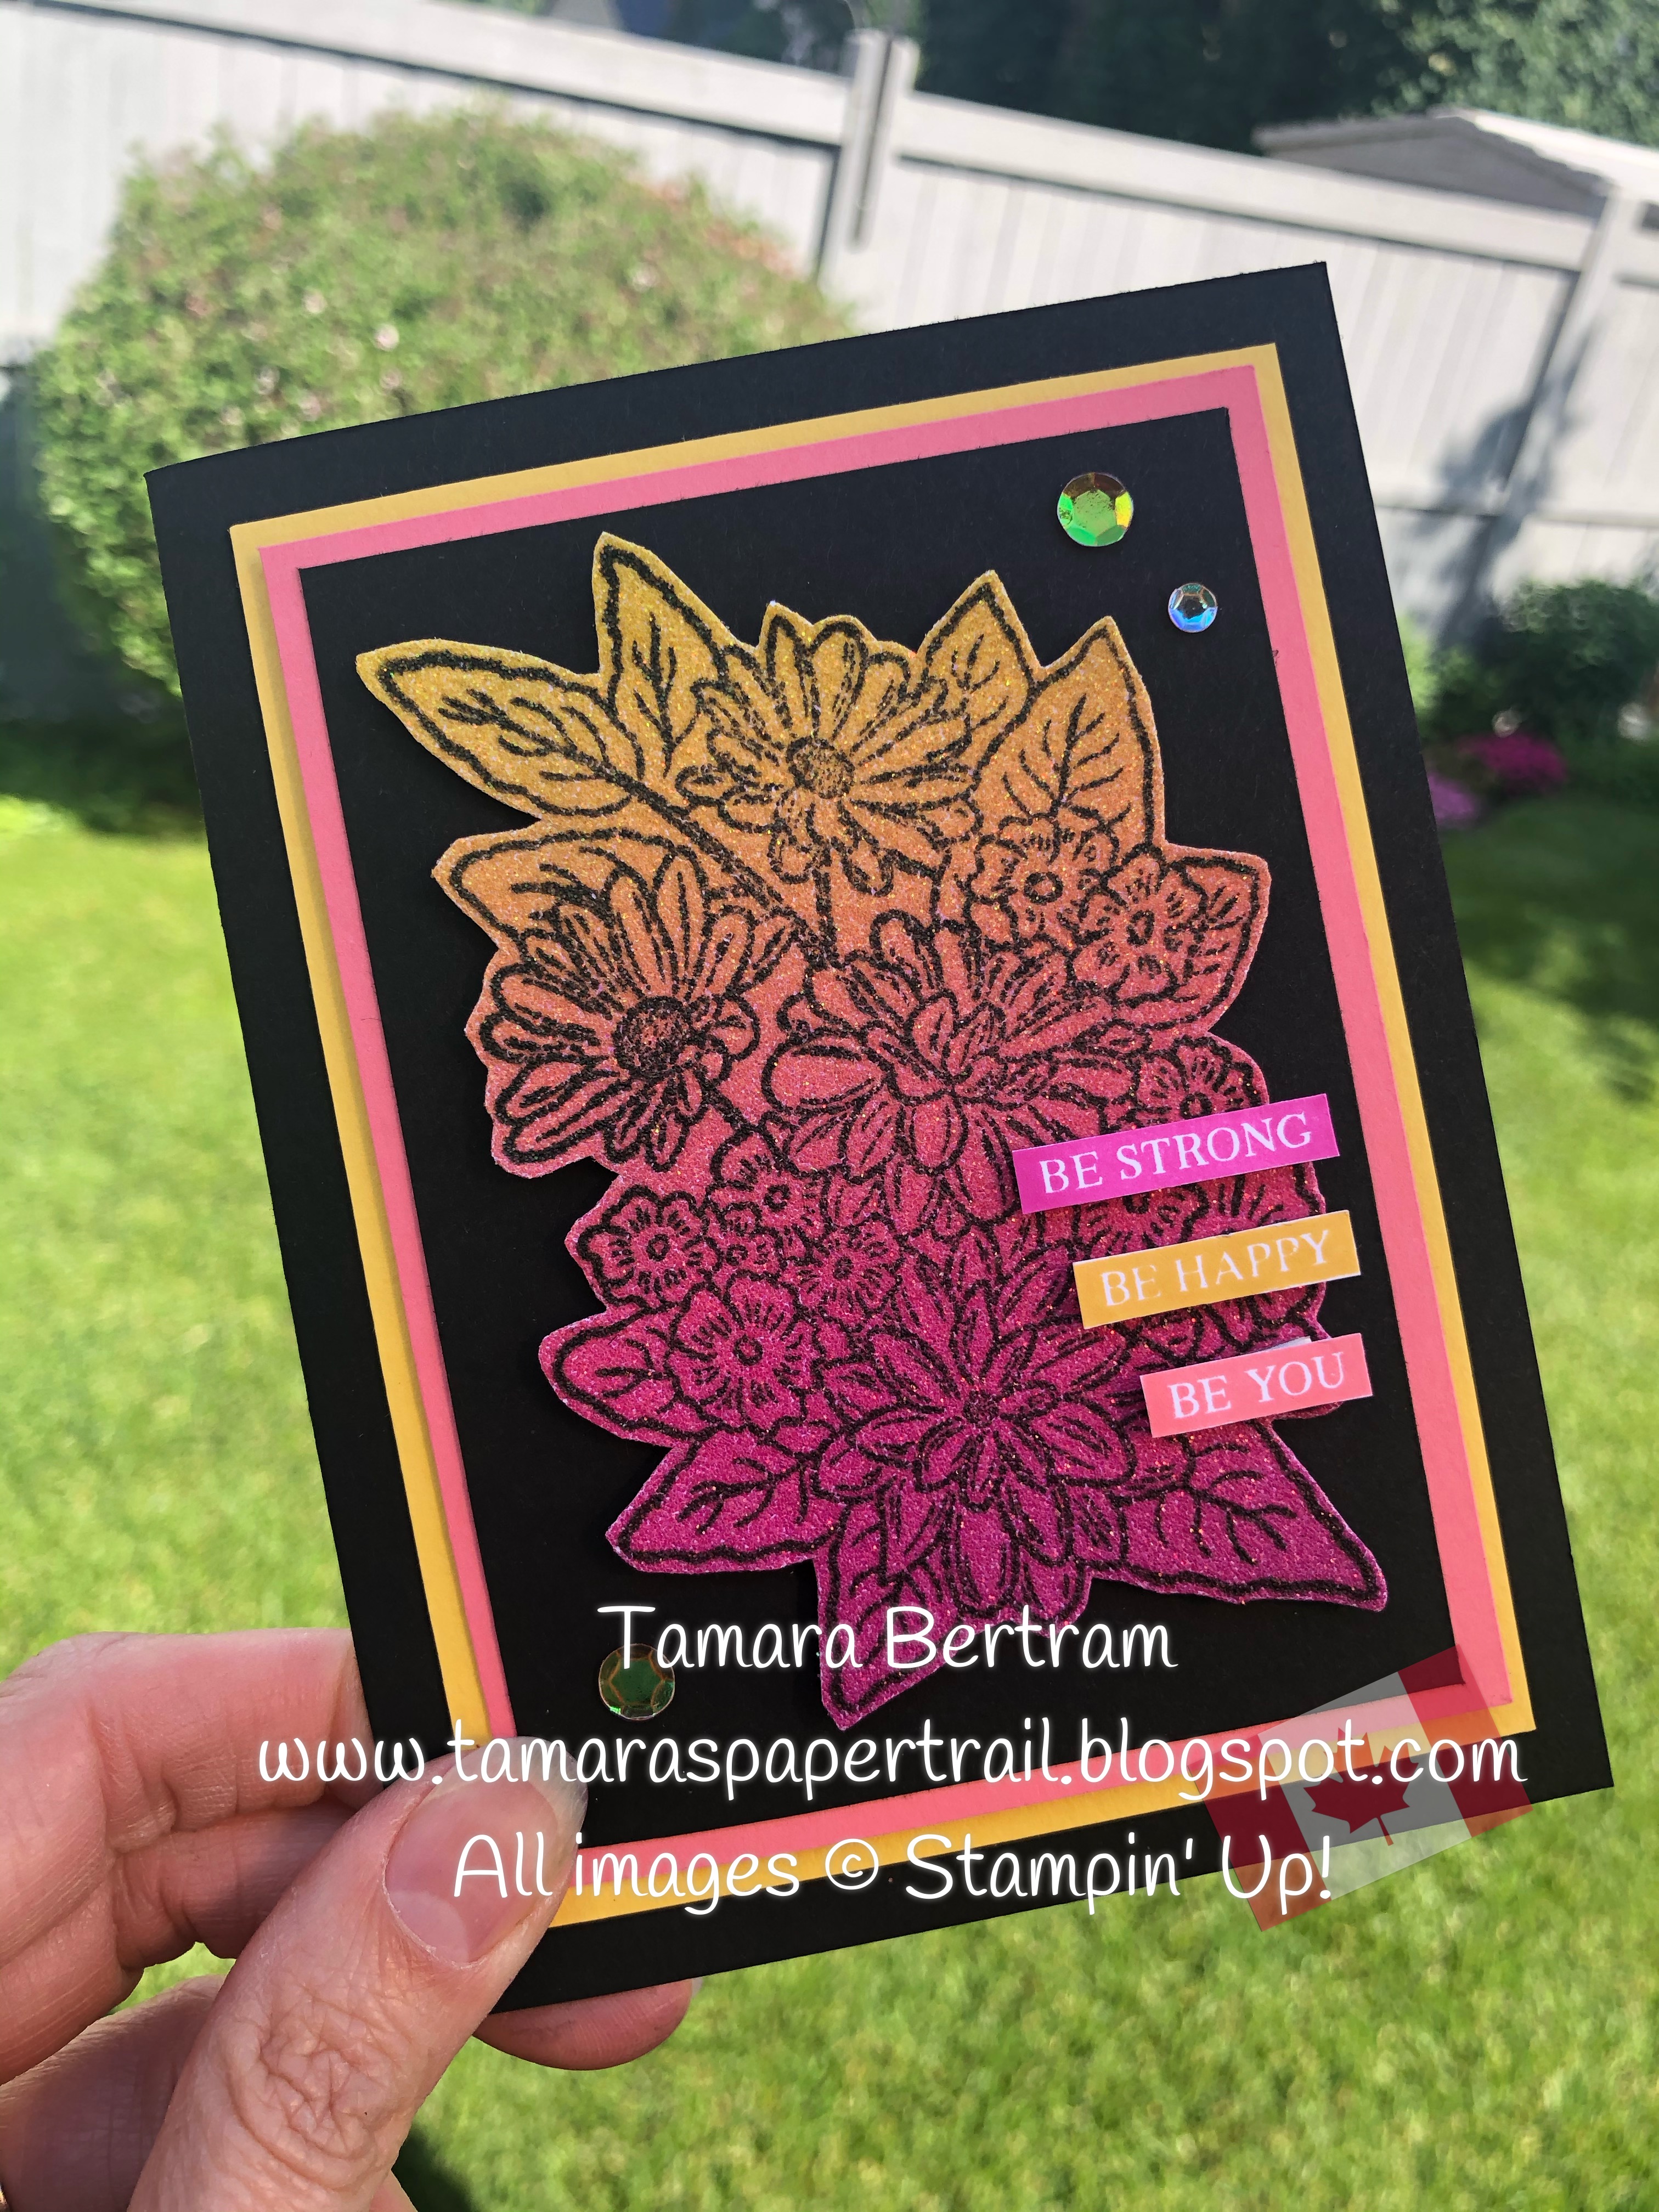
Sooooo sparkly!  I used the Ornate Gardens stamp set (on the stamparatus) and inked it with black Memento ink.  I stamped the image 4 or 5 times on the Rainbow Glimmer paper before it was dark enough for my liking.  I fussy cut it out and popped it up with dimensionals on a black layer measuring 4 1/2" x 3 1/2".  The black layer is taped to a Flirty Flamingo layer measuring 4 3/4" x 3 1/2".  THAT layer is popped up on dimensionals on a Daffodil Delight piece measuring 5" x 3 3/ 4".

The sentiment is from Rooted in Nature.  The 3 lines are actually one stamp so, to get 3 different colours, I stamped the entire sentiment in Magenta Madness then in Mango Melody (it was brighter than the Daffodil) and then a third time in Flirty Flamingo.  I then used my paper snips to cut out each row and popped them up on dimensionals.  To finish it off I added some Artistry Blooms Sequins.  Perfect!

I love this as my "Pride" card.  EVERYone should "Be Strong.  Be Happy.  Be You."  Everyone.

Thanks for stopping by - now check out the other blogs to see what THEY have come up with.

Have a stampy day!


Tam

Saturday, June 27, 2020

Peony Flower Die Video

Happy Saturday!

A quiet, cold, rainy morning here in Edmonton this morning.  My favourite!  Listening to the rain, cat on my lap, dog snoring away and a cup of coffee keeping me company while the family sleeps.  I LOVE my mornings!

Thought I'd pop in quickly to post my video on how to make the Peony flower on the project I posted last week.  It is SO easy it's ridiculous!

Here is my original project ...

... and here is my video showing you how to make it!

When you pop over to my YouTube Channel Id' love if you "subscribed"!  The more subscribers I have the more motivated I am to make and post videos.  I hope you like it!

Enjoy your weekend ... and have a stampy day!


Tam

Thursday, June 25, 2020

In Colour Combo - Stampin' Creative Global Blog Hop


Happy Blog Hop Day!

Tamara Bertram coming to you from Edmonton, Alberta, Canada.  Each month demonstrators from around the globe come together to share with you our creations around a common theme.  With the new 2020 Annual Catalogue now in full swing we decided the theme this month would be "In Colour Combo".  With a total of 10 In Colour colours (five brand new ones!) there are LOADS of combinations that can be made!  Where is a girl to start??!!

I'll tell you where I start ... especially when I just can't seem to come up with more than two colours to put together on a card.  I head to Uncle Google and I search for "SU Color Lab".  It takes me to a FABULOUS tool and website that helps me every time.  Seriously.  Check it out!  You just pick what colour(s) you want to work with and it gives you colour combinations to choose from!  Pick the one that floats your boat!

For example ... I knew I wanted to use our new "Misty Moonlight" ... and wanted some options.  Here is what the lab offered me ..
You can add in several colours and search or, like I did, just one colour.

I decided I really liked the Misty Moonlight and Seaside Spray pairing.  It was light and airy.  This is what I created with it ...


I love how it turned out!  ... and so quick and easy!
 
The stamp set I used is new in the 2020 Annual Catalogue - "Seaside View".  I was drawn to the calm, relaxing images.  Calm and relaxing is something ALL of us could use in our new world so I knew this was a set I would use a LOT this year!

I started with a Whisper White card base, added a 4 3/4" x 3 1/2" layer of Misty Moonlight, a 4 1/4" x 3 1/3" layer of Seaside Spray and a top white layer of 4" x 2 3/4".  I stamped the image in Misty Moonlight and then coloured the image with my Soft Seafoam Stampin' Write Marker (as the images I was colouring was so thin I wanted the precision of the journalling tip) and my Blends Markers.  I used the light Seaside Spray and the light Misty Moonlight.  Blends are the way to go when colouring larger images, like the carpets, to avoid lines in your image.

I stamped the sentiment in Misty Moonlight on a 1" x 4" strip of scrap and punched it with my triple banner punch.  (**tip - when using a 1" strip in your punch add 1/2" to the length you actually WANT, as you lose 1/2" when you punch it!)

I popped the Seaside Spray layer up on dimensionals and the sentiment, as well.  I added rhinestones from the "Holiday Rhinestones" and DONE!

SUCH a pretty little card.  I plan to mass produce this one.  I'll do the colouring while watching a show with the girls.

That's it!  Hop on down the list and check out what my friends have come up with for THEIR In Colour Combo.

Have a stampy day!


Tam

Monday, June 22, 2020

Prized Peony Meets Mini Paper Pumpkin Boxes - Kylie's Maui Achievers' Blog Hop


Happy Blog Hop Day!

Tamara Bertram coming to you from Edmonton, Alberta, Canada.  Each month demonstrators from around the globe create a new project using current Stampin' Up! supplies that we hope excite and inspire you.  With the new 2020-2021 Annual Catalogue going live a few weeks ago we are all now playing with our favourite NEW toys.  The hardest part of THIS month's hop was choosing which one(s) to focus on!

I'm actually really surprises at the products I decided on.  Flowers are not my usual "go to" ... and, to be honest, the Prized Peony Bundle wasn't originally on my "to-get" list.  I DID get it, though, and now I can't seem to stop creating with it!  In fact, I am now offering a virtual class USING this bundle!  It is a GREAT one for both quick and easy cards AND for intricate, detailed projects.  Check out what I came up with, as a treat for my Club Girls this month ...
Do you love it???  I do!  It's our new mini Paper Pumpkin boxes and inside are five notecards and envelopes.  What a GREAT little gift to have on hand for those last minute social distance BBQ's this summer ... or teacher gifts next week ... or any other occasion!  


The note cards were SO quick and easy to put together.  No layers, no cutting, just stamping and a bit of bling!  I stamped the flower image form the Prized Peony stamp set with Sahara Sand ink and then used my MARKERS in Petal Pink and Soft Sea Foam to just add colour to the shaded areas of the image.  I prefer using Blends but, with not layers, I didn't want the alcohol to bleed through the notecard and be seen on the inside of the card.  The markers worked well and I was happy to dust them off!  It's been a very long while since I've used them!

I stamped the sentiment (from Peaceful Moments stamp set) in Early Espresso.  I added some Clear Epoxy Droplets for a bit of texture and interest (on other notecards I used our retired Adhesive Backed Sequins, which you can still find in the Clearance Rack).  That was it for the cards!  I stamped the inside and the envelope and BAM!  Done!

Now the Mini Paper Pumpkin box took a little longer ... and yes, the flower IS a little fiddlier than I normally like .. but the result is SO worth it!  As with most things, the first one takes the longest, until you figure out what the heck you're doing!  The dies LOOK really intimidating but truthfully, there are just 4 cut pieces that make up the flower petals ... and they fit together like a puzzle.
There are numerous YouTube videos to be found on how to sponge and put it together.  Our very own Kylie Bertucci has one that shows just how easy it is!

To decorate the box I used a 5 1/2" x 3 3/4" piece of Peony Garden Designer Paper, added a strip of Petal Pink 5/8" Organdy Striped Ribbon, a white label that I cut from the Hippo and Friends dies and stamped the sentiment in Memento Black ink.  I popped the flower up on 6 dimensionals and then added the Pear Pizzazz/Mossy Meadow leaves with glue dots.   

Yes, more time consuming than my usual projects but SO worth it!  I LOVE treating my club girls and this project was perfect.  I hope you like it and can find some inspiration!

Click on the links below to see what my friends from around the world have on offer ... and have a stampy day!


Tam