Happy Tuesday!
As always I had a relaxing, productive Monday … and that means I had time to blog … and give you a picture tutorial of my new-found Marbling Technique. Ready? Great! Here we go!
Let's start with the finished product, shall we?
I absolutely LOVE the look and feel of this card! The marble piece at the bottom is made from paper, crystal effects, tissue paper, reindeers … and a window sheet.
Here is the same card photographed in my Craft Cave - different lighting but still a beautiful effect!
I just stumbled across this technique. It started when I saw a video tutorial made by "Frenchie" - a very popular and much-loved US Demonstrator. You can check her out at www.frenchiestamps.com . Frenchie did a tutorial on what she called a "stained glass effect" - but mine turned out VERY differently than hers and mine looked more marbled - so I'm renaming it! Thanks for the inspiration Frenchie!The main difference in what Frenchie did and what I did is that she used white glue … I used Crystal Effects. It makes a HUGE difference in how well your card lasts … I'll explain later …
So here is what I did.
I gathered my supplies - a piece of wax paper to protect my surface (this technique is kinda sticky!), a 1 1/2" x 5" piece of our Window Sheet (or other overhead projector acetate), our Crystal Effect lacquer, some thin tissue paper (thinner is better i.e. use the cheap stuff!), a 1 1/2" x 5" strip of Very Vanilla card stock, baby wipes (or a damp cloth) and some reinkers. I used Sahara Sand and Crumb Cake ...
Apply a glob of Crystal Effects to your acetate strip:
Smudge it around with your finger to pulley cover the acetate. Don't be stingy with it - more is better!
Apply drops of your first reinker - use your lighter colour first - this is the Sahara Sand:
Smudge it around with your finger ...
Apply a few drops of your second, darker colour (Baked Brown Sugar in m case) … and smudge around with your finger ..
Use your baby wipe or cloth to clean your finger!
Scrunch up then unscrunch (it's a word!!!) your tissue paper. DON'T flatten it i.e. leave it fairly wrinkly … the more wrinkles the more marbled effect you get!
Lay the tissue paper over your goopy acetate ...
Gently press the tissue paper with your finger so that the tissue paper is all wet ...
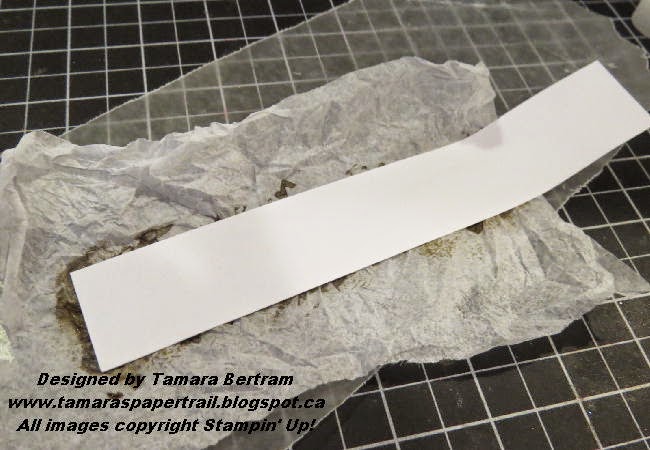
Lay your Very Vanilla strip over the whole hot mess ...
Turn it over and trim away the excess tissue paper (in this picture you can see my vanilla strip was longer than needed - I trimmed it it the 1 1/2" x 5" needed)
The acetate window sheet is now on top … smooth, shiny and (hopefully) sticky-free! You then just attach it to your card base and Wa-low! A work of marbled art!
Now … in the above card I had actually made it using white Elmer's glue, as Frenchie did. What I discovered a few hours later, however, was that once the glue was totally dry the acetate started to lift, the more I handled the card. Now this was cool and not cool. What was cool was that when I lifted the acetate off the marbled piece was STILL shiny and smooth. That was because of the shiny, dried glue. What WASN'T cool was that if I left the card without the shiny topping then, after mailing the card, the glue would very likely crack and flake … like dandruff! Not the effect I want! So for my Technique Class I used Crystal Effects adhesive. That is a lacquer … and that acetate won't move "for love nor money" as my dad would say *lol*
So there you have it - a technique I hadn't seen before that I LOVE! I can't WAIT to try this with different colours of reikers! I'm picturing light and dark blues … maybe Soft Sky and Night of Navy … with Black Staz-On snowflakes stamped on top of the acetate. Or how about Pink Pirouette and Cherry Cobbler?? The options are endless!
This technique and colour combination lends itself to a great masculine card. I and a number of stampers change the sentiment to Happy Birthday for their guys. Love it!
Oh - I finished my card off with some of the YUMMY new Gold Satin Ribbon and a few pearls. So elegant!
Right! That's it for today! Pop in again soon - I have a few more posts in the works! Until then - have a stampy day!
Tam


No comments:
Post a Comment