Sunday, June 12, 2016

Tin Dresden Flower

Ska-WHEEEEEEEEELLLLLL!

I FINALLY get to post about my tin flower!!!!  This has been something I have wanted to make for almost a year now, ever since I saw fellow demonstrator (and now Facebook friend) Laura Barkman post a picture of HER tin flower on her page.

CHECK.  THIS.  OUT.

****INSERT REALLY LOUD SQUEALS AND JUMPING UP AND DOWN WHILST CLAPPING LIKE A 3 YEAR OLD HERE!!!****


Favorite.  Project.  EVER!

Let's see it again!

Let's squeal and jump and clap again!

Isn't it super fantastic amazing????

SUCH a long process to get this little beauty on my fence.  MAN!

Ok - so backstory (you know how I like my backstories ….)

Last July I saw this beautiful flower posted on Laura's FB wall …
I totally FREAKED, I loved it so much! I messaged her for details on how she made it.  In a nut shell she made it with tin flashing and our (retired) Dresden Big Shot Die.  Naturally - one of the very few dies I DIDN'T own …. and the search for a Dresden Die began!

Now before I go any further I want to give full (and long) credit where credit is due.  

I CASED the project from Laura Williams Barkman in Winnipeg, Manitoba, Canada (www.laurabarkman.stampinup.net)
Laura CASED the project tom Connie Collins in Nashville, Tennessee, USA (www.costantlystamping.com)
Connie got the inspiration from Diana Gibbs in Arizona (but is a Canadian gal!) (www.dianagibbs.typepad.com)
Diana got her inspiration from Linda Barnes in Garland Texas, USA (www.countrycharmcreations.blogspot.ca)

I LOVE how we all inspire each other … and how we (rightfully!) give credit where credit is due.  Good, common courtesy!

Right - back to my story.  I searched high and low for a Dresden die locally - Kijiji, ebay, Craig's list, garage sales, Facebook … I DID find some on ebay alas they were all located in the USA.  Yes, they were generally n the $25 price range but when you factor in the icky dollar exchange rate, the $25'ish in shipping and the possibly $20+ customs fee when it got here the price would be closer to $85!  Ya no.  Wasn't gunna pay that no matter HOW badly I wanted it.  The search continued.  Every month or so I'd search again … with the same results.  Of course the whole thing made me a) more determined and b) more want-y … wanty?  Sure!  New verb.  I wanted it really, really badly … wanty!  (My blog - I get to make up words if I wanty to *lol*  I crack me up … but I digress …)

Lets fast forward 9 months … it was now April, 2016.  I was doing my monthly Dresden Die search and was (once again) wondering why shipping within the States was only $5 but a little further north and it's $25 … plus duty.  Oh …. if only I knew someone in the states … who was coming to Canada … if THAT were the case I could ship it to them and they could bring it to me for free.  Oh …. if only … wait a minute!  I DID have a friend in the States … and she WAS coming to Canada in just a few weeks!  ** insert clouds parting, sun shining down and angels singing "ahhhhhhhhhhh" here **.  Yes! My prayers had been answered!  My Mom's BFF from when she was in HIGH SCHOOL loves in Texas … and was coming up to Winnipeg (where her and Mom are from) for a birthday … and my Mom was going to meet her there.  I contacted her and "absolutely!" she was HAPPY or me to order the die, ship to her, she would bring it Winnipeg, give it to Mom and Mom would bring back to me, here in Edmonton.  The BEST best part?  It only cost me $17 Canadian.  I was absolutely TICKLED and SOOOOO excited!

I got my die mid May.  I researched Connie's tutorial on how to make them, picked up all the necessary supplies and here we are today - June 12, 2016 and my tin flower is hanging on my fence.  One down, four to go!

Like my story so far?  How can you not?  It's like your sitting here talking with me, right?  hee hee - ya, I know … I gotta get out more!

OK - so let's get down to the nuts and bolts of this bad boy.  I'll first give you the link to Connie's tutorial that I used.  Access that here.  Thank you Connie for your details and info - they were bang on!

Now - Here is MY tutorial, tips, tricks and "what-I-did"s …

First up - supplies

I had Craig pick me up a roll of tin flashing from Home Depot.  If memory serves it was about $15 for the roll, which was 10" wide x 12" long.  I have picked up a second roll - this one is 10" x 18" for $20.  I wanted to try this size as the piece I need to cut are 6" x 9" … might get more with this size.  From the original roll I had all the pieces I needed to make TWO complete flowers (despite cutting the wrong size pieces for the second one and wasting some tin.  Argh!  Oh - you find the tin flashing in the roofing aisle (aisle 21in my hood!)

To CUT the tin I started off just using my (retired) Craft and Rubber Scissors.  They worked ok. Not gunna lie, I was slightly terrified I was going to slice my hand open on the tin.  Didn't happen though!

Just a note on the tin - it is only about as thick as a tin can but, yes, it can be very sharp when you are cutting it so be careful!

After cutting 12 pieces of 9" x 6" tin for my petals I asked Craig if he had any tin snips.  He did.  That made cutting a bit easier so that is what I will use from now on.

So, as I said, I cut 12 pieces 9" x 6", which is the size of the Dresden Die.  You get two petals per - so once I ran them all through the Big shot I had 24 petals.  12 large and 12 smaller.  This is what the Dresden Die looks like, if you aren't familiar with it …

Once I cut my pieces I ran each one through the Big Shot with 12 different embossing folders.  I think all but two were retired.  I was shocked how well and easily the tin embossed!  It really was no different than embossing paper.  No, the large petals don't fit 100% in the folder but that's ok - you glue them at the bottom of each petal and the large petals are covered by the smaller petals so no one will see the un-embossed portion.  Here are my pieces ...
I headed to "the *M* place, 50% off coupon in hand, and bought myself a can of Krylon spray paint.  It is good for a wide variety of materials (metal included) and for outdoor.  They are (I think) $12.99 a can … but of course with coupon is $7.  I'm going to check out paints at Home Depot next trip out.  I've exhausted all the colours I like at Michaels and Craig checked - Home Depot has a few outdoor brands that will work so I want to check the colours they have.  So far (from Michaels) I have the red, yellow and orange seen here and I bought a Tempting Turquoise-type colour.  I love the red - it's close to Cherry Cobbler.  Love the yellow - Like the old Yo-yo Yellow but kinda hate the orange.  It LOOKED really bright in the store but it really is a Pumpkin Pie.  I LIKE Pumpkin Pie but I wanted really vivid, bright colours and the orange is too "muddy" for my liking.
I liked the coverage of the red.  It took two coats … here for the odd piece I missed. The yellow took three or more coats.  I really don't like how that one went on.  It took much longer and, to get the coverage I wanted, I had to hold the can much closer to the petal … and then it was too close and the pain pooled on some.  Definitely a higher-maintenance colour!

Once the pieces were dry (I let them sit in the kitchen overnight) I needed to glue them all together.  This step I was dreading.

I started by laying them out with the spacing I wanted.  I then traced the pieces to form a template (anticipating I will be making dozens more of these!)
I then added my glue.  Per Connie and Laura's recommendation I used an industrial strength glue I got at Michael's - E6000.  Again, with a coupon in hand (this is partially why it takes 3 weeks to make one of these flowers … you need to gather three or four coupons and make the trek to Michales as many times *lol).  This glue is NOT cheap!  I bought the largest bottle they had.  It's $18.99 before the coupon.  Here it is ..

Once my petals were arranged as I wanted them I ran a bead of glue all around the bottom of the petals … see the glossy circular glue-ring?)  …


Then I attached a Scalloped Circle.  Oh!  Guess I forgo to mention the scalloped Circle.  Yes - back when I was cutting out the petals I also cut out three scalloped circles (using the retired Scallop Circle Die) …

… and I cut one 3 1/2" circle using the (retired) 3 1/2" circle die (Can't find a picture - is the same as above … but not scalloped … and 3 1/2" big *lol* - there I go cracking myself up again …)

So …. I attached the scalloped circle piece to the glued petals ...
… and added a "weight" to it while it dried.  Now - in my defence - I don't typically keep bottles of booze in my craft room (chocolate, yes - booze, no) … I was assembling this on my husband's bar … and of course the only heavy weights I had nearby were the full bottles of liquor *lol*.  Use what y'uv got, right???

I wanted to ensure a REALLY good seal … so ….
I let the glue set for 2 days.  Yes, you need it.  The glue is still tacky and a wee bit soft if you don't do it 2-3 days.

Next up I added a generous amount of glue for the top, smaller petals ...
… and assembled ...
I didn't bother to wait 2 days for it to dry … I just added the second scalloped circle to the top.  I used LOTS of glue ...
… attached ….
Added glue to the 3 1/2" circle … 9notice I didn't glue too close to the edge as I didn't want the gel seeping out ...
… and added LOTS of weights …. (*lol*)
I DID have to wait 3 days (72 hours)for the glue to completely dry and harden.

Naturally I neglected to take pictures of the next step … but not really needed.  When I picked up the finished project I wanted to make sure those large back petals were REALLY secure.  If you recall from the first picture, just the lower tips of each petal were glued to the scalloped circle …
I wanted something sturdier … so I added the third scalloped circle to the BACK of the project (if you pulled up Connie's tutorial you'll not she only cut two scalloped circles - I recommend the three).  I also added three pop tabs for hanging …
(eek!  Outdoor 8:00 pm lighting!)

Craig threaded some wire through the two lower pop tabs (yes, just take the off your empty pop/beer cans).  I added three tabs as I wasn't sure the best way to hang them - At first I thought just one tab, in the middle, to be hung by one nail … but later thought it would be better to spread out the weight of the finished flower amongst two tabs and a wire … and that's what we went with in the end.

So there you have it.  10 months + 2 weeks and $50 later I have my flower.  

Next up … a yellow one … and a blue one … and two more yet-to-be-determined-colours … and then I will have 5 on my fence making my yard even more colourful than it already is (thanks to my husband with a very green thumb!)  Tin flowers are my contribution … maybe these ones I won't kill *lol*

Phew!   That was a looooooooong post.  Time to snuggle with the girls over a show before bedtime.  Pop in again soon - have a stampy week!


Tam

SaveSaveSaveSave

Monday, June 6, 2016

Botanical Wishes

Happy Monday!

Another beautiful day in the neighbourhood!  Loving this weather!  Not-too-hot, not-too-cold!  Koda is needing a hair cut but doesn't go for another week so we have to go for our morning walks earlier in this weather.  Poor pooch gets too hot!  So let's get too it, shall we?

Last night I DID manage to spend an hour in my Craft Cave - just enough time to come up with my third card for class this week.  I TOYED with having everyone make one of the wee coffee cups I posted yesterday … but I'm making those for the June treats and it won't be much of a treat if they already HAVE one ... so thought I'd make a card using the Botanical framelits instead.  This is what I came up with …
I love the soft look of it!  I'm really into clean, simple cards this month, no?

I used Mint Macaron ink.  Both the mint layer and the Whisper White layer are cut 3 1/2" x 4 3/4".

I stamped the flourish from the (awesome) set Timeless Textures (it was in the Occasions catty but made it into the Annual catty - yay!)

It took me 5 tries to get the flourishes the way I wanted them.  For the "Finally!" version I "stamped off" before stamping on the card stock to soften the colour just a little more.  I stamped it three times in different orientations.

The sentiment is from another "must have" set - Rose Wonder.  I just LOVE the phrases and font in this very versatile set.
Once the flourishes were in place I punched out a Whisper White flower with the Botanical Blooms framelits - with a Crushed Curry centre.  In the centre of THAT I used a White Perfect Accent …

I wrapped some gold thread around three fingers (4) times and taped it to the card before popping the flower up on a dimensional.  I added three more accents to finish it off.  Clean, simple, soft, elegant.  Love it!

That's it for today - Doodles is waiting.  Have yourself a stampy day!


Tam

Sunday, June 5, 2016

Botanicals Mini Cup

Happy Sunday!

SUCH a great weekend … and there is still half to go!

Yesterday was a GREAT day of relaxation and laughs.  It started bright and early with some stamping - wa-hoo!  My fabulous friend (and up-up-line) Tamye Dunbar held her monthly Diva Day stamping morning so I got to have coffee, snacks, stamping and laughs with a GREAT group of friends.  The weather was PERFECT for a patio gathering afterwards in Tamye's amazing backyard.  We won't meet again until September so it was really great to spend a little extra time just "hanging out".

Home to hang with my peeps … well … ok, to watch my peeps stare at their iPads for a while *lol* … got a wee nap in … then we went for dinner with Craig's sister and BIL to our newest favourite Vietnamese restaurant.  We finished the evening off with a nightcap on our patio.  Such a fun, relaxing day!

A whole lot of nuthin' going on today - just the way I like it!  Life is good!

With such beautiful weather I doubt I'll make it to the Craft Cave today but I DID make it down Friday.  I was positively GIDDY over what I came up with.

Backstory …. Months and MONTHS ago I ordered those teeny tiny 3 oz paper coffee cups and lids you may have seen all over Pinterest boards.  I had been wanting some for a few years alas trying to find these things in Canada is like trying to find your contact lens in a snowbank.  Seriously!  I managed to track some down in the US … and … as is always the case … I almost choked when I did the currency conversion and calculated the shipping costs.  MAN!  Those extra costs really hurt … but … I wanted those darned cups so I did a Facebook post to other stampers and managed to get a large bulk order together so we could all get those shipping costs down.  We got our cups and we were all thrilled.  Naturally I put mine in my craft cupboard and there they have stayed … unopened … for months.  Sound familiar? *lol*  I DID let the kids have a few so they could decorate mini coffee cups for their dolls … but I just hadn't made the time to come up with anything myself …. until Friday. Wanna see what I made?  Hee hee - so stinkin' key-UTE!
 Hee hee - it just makes me giggle!!!

The stars of the show for this cutie patootie are the Botanical Blooms "toys".

OK - anther backstory (ya, feeling a little chatty this morning!).

I resisted getting the Botanical Blooms framelits … and stamp set … and DSP ever since they were released in the Occasions Catalogue.  I saw them (and used them) at the On Stage event I attend last fall … and I REALLY didn't like them.  If you have followed my blog for a while you know I'm not a big fan of flowers (either paper or real).  I have all the "old" leaf framelits and Big Shot dies and thought "Ugh.  ANOTHER flower/leave bundle?!"  When Stampin' Up! asked for feedback from the On Stage event they asked which products we were likely to buy.  I marked off "definitely would not buy" for this bundle.  Ya.  Never say never.  Flash forward 6 months and guess what I now own … and love?  Yup.  Resistance really is futile *lol*.  I saw one too many great projects with the framelits.  My friend (and fabulous Artisan member) Krista Frattin finally tipped the scale from "should I?" to "I NEED it" … and I bought it.

Friday I decided I would OPEN those darned cups … and TRY those darned framelits and I am so glad I did.  Love.  Love.  LOVE this bundle!

Right!  Enough rambling already - let's get to the meat and potatoes of this bad boy!

First off I made a little belly band using the (now retired) Botanical Gardens DSP.  (When I bought the bundle it came with the set, the framelits and the DSP.  The set and framelits are available in the new catalogue but not the DSP … and the set/framelits now have to be purchased separately i.e. they aren't bundled together this round)

Botanical Builder $44
Botanical Blooms Photo $21
Botanical Gardens DSP - retired
So!  To make the bell band …

I used a 1" x 7" strip of DSP.  Alas, you can't just cut a straight piece.  The cup is tapered and a straight belly band won't lie straight …

… so you need to cut a curved strip.  I dissected one of the cups so I could get the curvature just right.  I cut a template for the band FROM the dissected cup...
I traced it onto the DSP and cut it out ...

I then used my framelits to cut out the flower (Whisper White and Crushed Curry) and the leaves (Mossy Meadow (retired *sniff)  and Pear Pizzazz).  I also punched out  a garden label thingie (NOT being a gardener I don't even know what these things are called … stakes?  Dunno *lol*).
The garden stake framelits just retired as well (sorry to be using so many retired products … trying to use some of my stash items and papers!!).  You may be able to find them in garage sales or on line.  They were from the "Handpicked" framelits - and there were a few coordinating stamp sets.  I didn't use the coordinating set - rather I used the "thank you" from the Endless Thanks set, stamped in Mossy Meadow ink


Once my pieces were punched out I just had to assemble.  I used my Multipurpose glue for that - it dries quickly and is strong.
 I popped the stake (?) into the stir stick hole in the lid a wa-low!  One "totes-adorbs" little cup!
I plan to hit Costco tomorrow for some bulk Wildflower seeds.  I believe (2) of the Miracle Grow Wildflower packs are $16 - best deal in town since a single, smaller, container at Home Depot is $12!  I'll put some in little ziplock bags from the Dollar Store and have a sweet little gift for my customers this month.  So cute I can't STAND it!!!  *lol*
Right!  Before I get the flood of emails asking where to get the coffee cups and lids ...

Buy the coffee cups here
Buy the lids here

No - I don't have any extras to sell … but if my Edmonton peeps want to do another bulk order I can order them and we can all share the cost of shipping.  If memory serves it comes to around $15 (Canadian) for 50 cups and lids (that includes the shipping and currency conversion).  ** If you are in Edmonton and are interested drop me an email here and I'll be in touch**

So that's my share for today.  Koda doesn't LOOK ready for his walk …
… but as soon as I close my laptop he'll spring to life and will be ready to go.  Love that scruffy fur face!

Whatever you get up to today I hope you have a fun, stampy day!


Tam

Wednesday, June 1, 2016

Swirly Christmas

Happy Wednesday!

Now unless you've been trapped under a pile of fallen stamp sets you will know that today is the day the NEW 2016 CATALOGUE goes live!!!  *insert squeal of excitement here!!*

Whilst I'm sad to see some grey products retired forever (*insert frowny face here*) I'm SUPER excited to get my hands on all the NEW toys!! (*insert another squeal of excitement here*)!!!  I need to type fast because as soon as I'm don't this post I'm placing my order!!

If you don't have your physical catty yet click on the catalogue over to the right to access the on-line version :)

Just two quick things to point out …

#1. - the Starter Kit (aka "Try It Kit" aka "Fabulous Kit of Awesomeness") is even BETTER than usual!  You get $165 worth of product for the flat charge of $135 AND you get to pick out two extra stamp sets of ANY value for FREE!!!!!!!  Ska-WHEEEEEEEEELLL!!  That mean you can scoop $301 worth of products for just $135 - FLAT!  *insert heavy breathing here*

#2 - during the month of June any parties with orders reaching $400 or more gets and EXTRA $40 in free stuff (i.e. $88 for free)!  FREE!!  FREE IS MY FAVORITE!!  *insert more heavy breathing here*

Right.  Ok …. lamaze breathing …. whooooooo …  whooooooo …. whoooooo …

Let's move on to a card while I try to bring my heart beat back down, shall we???  *lol*

So!  What screams "Happy June 1st!"?  A card with butterflies?  Flowers?  Rainbows?  Ya no.  The answer of COURSE is a Christmas card!!  Check.  It.  Out!
Yay!  Love it!

Now I'm not gunna lie - I have now made, what, 4?  5?  … cards using the Swirly Bird and/or Swirly Scribbles bundle … and I've loved every card so far … but I'm ready to move on now.  I need.  New.  Toys.  *lol*

Last night I was scrolling through the Demo Only website, checking out the top card samples from across the SU world (this website is an AWESOME resource to us demos and if/when you buy that Starter Kit above you get access to it - just sayin') and spotted a card made by Christine Slogar.  Lookie …
Isn't it fun???  I saw the wreath and quite literally, within minutes I was down in my Craft Cave making myself a Christmas card.  Super Love!

I used the new Emerald Envy green card stock for the wreath, using the Swirly Scribbles Thinlit.  The actual piece that is cut out is much "fuller" than here (same piece as my tree top in my earlier project).  I simply snipped off some of the middle to make it less "full" and more wreath-like.

So - full deets …
Standard Card base of 8 1/2" x 4 1/4"
Real Red Layer of 5" x 3 3/4"
Whisper White layer of 4 3/3" x 3 1/2"
Wreath cut with Swirly Scribbles thinlit in Emerald Envy, attached with fine tip glue pen
Berries punched with Owl Punch in Real Red, attached with glue dots
Sentiment from "Holly Jolly Greetings", stamped in Basic Black
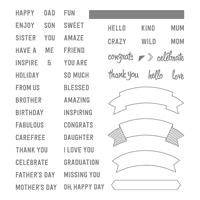
"Jolly" stamped in Emerald Envy first, THEN stamped with the banner from Thoughtful Banners and then punched out with the banner duo punch and popped up on dimensionals
I colord the berries and tips of the banner with my Wink of Stella clear pen.  LOVE that stuff!!

Love.

Right!  Now let's do a little shopping, shall we????  That will ensure a REALLY stampy day :)


Tam