Wow - 8 years old. I won't say it - we all say it - so I won't say it.
Rebecca's birthday is on Easter Monday this year. She INSISTS on having her party on the actual date of her birth so Easter Monday it is (I just hope everyone isn't going to Grandma's house for Ester dinner and that they can come to her party!) She decided on a bowling party (skating and swimming were in the running but for skating the helmet would squish her hair and for swimming she couldn't wear her pretty dress ... not to mention the fact that she can't swim!) so bowling won. As usual I made her invitations. I LOVE them :) They took a lot longer than I thought they would to make but a crafting mom's gotta do what a crafting mom's gotta do, right? Here's what I came up with:
Yes, it's another penny spinner card. Hee hee - once again I sit and giggle at my card (there is a distinct possibility that I'm "losing it"!)
I used a clipart picture from the internet for the bowling pins. I cut them out, colored the red stripes and popped them up using dimensionals. I used the word window punch for the slit for the bowling ball, which was made with the 1" circle punch. I used whisper white craft ink and a Q-Tip for the white dots (my white gel pen wouldn't co-operate!) The squiggles are from my very first stamp set that I got in my starter kit. The name escapes me but it has been retired for about 4 years. I use this stamp on LOTS of cards (and LOTS of envelopes).
I have another card to post but have to run so you'll have to come back tomorrow to see it. I know, I'm a card tease :)
Have a fun day!
Tam
Welcome to my Blog - a place where you can learn how to make quick, cute cards using Stampin' Up! products!
Monday, April 11, 2011
Thursday, April 7, 2011
National Nurses Week ...
is May 9 - May 15. I had a friend ask if I had any ideas for a card. Here's what I came up with ... don't you just LOVE it??!!?? Hee hee - it makes me giggle it's so flippin' cute ... (and it only took me 20 minutes to make!!! Guess I have those creative juices a flowin' today!)
I made the little hat as follows:
Start with a whisper white piece 3" x 1 3/4". Score 1/2" up from the bottom of the 3" side and fold up. To get the angle, cut from the score line up to the top 3/4" in (that makes no sense, does it? If you really want instructions e-mail me and I'll try to explain it better!) The DSP I used is from the retired "Night & Day" (which coincidentally I just bought more of on the awesome Clearance Rack deals they had last week!). The buttons are retired but you can still get Real Red buttons in the current catty, just a different design. I made the cross starting with a little square made using the (gasp!) RETIRED little square punch (who knew?!) and cut out the corners with my paper snips. The sentiment is from Wonderful Favorites and the "you" is from "Celebrate Everything" (retired). The "you" is punched out using the new medium oval punch (in from the holiday mini but is still available for ordering) and the Large Oval punch, popped up on a dimensional. The red border uses the Eyelet Border punch. I think that about covers it!
I'm off to McDonald's now with the girls - feeling good that I got a project off my plate!!
Tam
Spring at last!
Yes, it seems to have FINALLY arrived! In the same way that I get the itch to spring clean, go for walks and change the flannel sheets to cotton I also get the itch to start crafting using brighter, springier colors - it's time to push the neutrals aside for a while and start reaching for the brights!
I had been eyeing the "Bold Blossoms" set in the mini for some time now and I finally bought it (actually I earned it for free!) and got it out yesterday. It didn't tkae me a FULL 2 hours to make this card but it did take a bit of time to get the color combination just the way I wanted it :)
I made it into a penny spinner card :) Once again the picture doesn't reflect the proper colors - much prettier in real life! I used Poppy Parade (took me a while to warm up to this color but I find I'm using it more and more these days!) Wild Wasabi and Daffodil Delight. I used the 1" and 1 1/4" circle punches for the flowers and the 1 1/4" and 1 3/8" circle punches for the butterfly. For the body of the butterfly and centre of the flowers I used the rhinestones and colored them with my green sharpie. Sooo pretty :) I added glitter to everything for that extra punch of bling. I love that you can use any sentiment in the little window. Teeny Tiny Wishes covers most occasions you would want.
Funny how I spent 2 hours on yesterday's "quick & easy" card and then went downstairs at 7:00 pm and came up with this in about 20 minutes:
Again - the color stinks in the picture but is really pretty "live". This card easily designed itself. I have always wanted to try the "baby wipe" technique. After 5 years of crafting I finally tried it and this was the result. I like it! (Guess what technique we'll be learning in tomorrow's class?) Solid images work best for this technique and I had it in mind when I bought this set ($2 from the sale of each of this new Strength & Hope set goes towards Breast Cancer research). I used More Mustard, Cherry Cobbler and Chocolate Chip reinkers on a baby wipe creating my own custom ink pad. I used the same "ink pad" for all 3 stamped images. I layered the butterfly and the swirl on More Mustart and Cherry Cobbler cs and added More Mustard brads. What a fun technique!
That's it for now - I'm going to try to work on my National Nurses Week card and a few workshop cards today ... but we'll see what happens. It's a half day for Rebecca and gymnastics this afternoon. I have to set up for my class (since tomorrow is full of errands and deliveries!) and of course there are the usual daily chores that need doing. Fingers crossed I can get a little stamping in :)
Have a fun day!
Tam
Wednesday, April 6, 2011
Seriously?
2 HOURS PER CARD today. Seriously! My creative juices were very slow in flowing today I tell ya! I had a great PLAN for the day - ship the kids off to school then spend 3 hours in my craft room. I had SOOOO much work to do - design Rebecca's birthday invitations, make (and mail) Easter cards, send a Thank You card to a friend, design a card for National Administrative Assistant week, design a card for National Nurse Week, decide on a technique for FRIDAY'S class, DESIGN the technique class for Friday's class, design two other projects for Friday's class, make a card using my new stamp set and DSP, make a 3-D card using the flower punch or flower Big Shot Die .... the list is a looooooooong one. Of course when you leave things until the last minute the only thing you can be sure of is your plan will never play out the way it was supposed to. Alicia woke up this morning feeling "queasy". Hmm - I knew she wasn't faking because she was having a party at school today - kids don't fake being sick when there are parties (only when there are tests!) Well, she had a bit of soup (for breakfast!) and went off to soup feeling so-so. Fearing I would get a call from the school I jumped in the shower and put on some "slap" do I woudn't scare the children if I DID have to go to the school. Yep - as I finished "the process" I got the call. Alicia still didn't feel well. So much for my plan of uninterrupted crafting! I DID manage to get some cards done but it was a PAINFUL process. Seriously - I literally laugh when I look at the simplicity of this card knowing that it took me close to 2 HOURS to make it. 2 HOURS!!!!!!! LOOK AT IT! Sheesh! While I love it I can't believe it took me so long! I just sat and stared at the paper for EVER. The paper is fantastic but it's just so busy that the rest of the card HAS to be simple - here's what I came up with (yes ... after 2 hours ...)
I used Bravo Burgundy cs, ink and button (retired so if you don't have the buttons just stamp a button from Button, Button and punch it out with the 3/4" circle punch!). I also used the corner rounder and the sentiment fromg Bring On The Cake (that's a MUST HAVE set!!)
OK - have to put the kids to bed ... tune in tomorrow for my other 2-hour projects (that will only take you 20 minutes to re-create!)
Tam
Wednesday, March 30, 2011
Variations on a theme ...
Happy Wednesday! I hope you are all surving Spring Break without resorting to alcohol at 8:00 am :) Gotta admit by noon on Monday I was getting a little twitchy and wondering how we would all make it through the week but things have improved - the bickering has lessened a bit and we have been outside which REALLY helps (we're off to the park again right after lunch).
While the girls were playing this morning I snuck down to my craft room to do some much needed crafting (yes, I have to sneak - they always want me near by!) My high-school best friend is coming over Friday night to make Easter cards with me and my girls so I figured I should have some ideas ready. Here is the first one - look familiar? Yep - it's a variation of my Circle Circus birthday card:
It's not my FAVORITE card of all time (I'm not a hugs fan of the traditional Easter colors) but I think it will be fun (and easy) for the girls to make.
I then wanted to make a simpler version of this card:
Here is what I came up with:
(I used Crosses of Hope, God's Blessings, the Tuplip embossing folder, Concord Crush cs and ink, finger dauber and a rhinestone)
Finally - a friend of mine is getting married in April and I want to give her a stack of Thank You cards as a gift. I tweaked this card:
... and came up with this one:
(I used Sahara Sand ink & cs, Tulip folder, finger dauber, Bliss, Black Staz-On, Modern Label & Word Window punches, pearls, dimensionals & the sentiment from Short & Sweet)
So although my projects aren't 100% new they certainly fit the bill. Heck - why re-invent the wheel, right?
I hope to do more crafting in the next few days so I can use my BRAND NEW stamp set and designer series paper from the upcoming Summer Mini catalogue. Check back soon to see what I come up with.
Have a happy day :)
Tam
While the girls were playing this morning I snuck down to my craft room to do some much needed crafting (yes, I have to sneak - they always want me near by!) My high-school best friend is coming over Friday night to make Easter cards with me and my girls so I figured I should have some ideas ready. Here is the first one - look familiar? Yep - it's a variation of my Circle Circus birthday card:
(I used Circle Circus, Perfect Plum, Certainly Celery, Daffodil Delight, Pretty in Pink, Concord Crush and Marina Mist inks and the Concord Crush cs & ribbon, the jumbo scallop and 1 3/8", 1" & 3/4" circle punches - and lots of dimensionals)
It's not my FAVORITE card of all time (I'm not a hugs fan of the traditional Easter colors) but I think it will be fun (and easy) for the girls to make.
I then wanted to make a simpler version of this card:
Here is what I came up with:
(I used Crosses of Hope, God's Blessings, the Tuplip embossing folder, Concord Crush cs and ink, finger dauber and a rhinestone)
Finally - a friend of mine is getting married in April and I want to give her a stack of Thank You cards as a gift. I tweaked this card:
... and came up with this one:
(I used Sahara Sand ink & cs, Tulip folder, finger dauber, Bliss, Black Staz-On, Modern Label & Word Window punches, pearls, dimensionals & the sentiment from Short & Sweet)
So although my projects aren't 100% new they certainly fit the bill. Heck - why re-invent the wheel, right?
I hope to do more crafting in the next few days so I can use my BRAND NEW stamp set and designer series paper from the upcoming Summer Mini catalogue. Check back soon to see what I come up with.
Have a happy day :)
Tam
Wednesday, March 23, 2011
Two Years Later ...
... this stamp set actually sees ink! Yes - I bought the "Flower For All Seasons" two years ago ... maybe it was THREE!! I bought it because I wanted to make a little desk calendar (you know - the ones that were all the rage a few years ago) and this set seemed to be the perfect size and style (truth be known I wanted the TREE for all Seasons but it hit the retired list and I didn't want to buy a set that was retiring ... although I still like ... and want that set ... so if you have it and want to sell it to me let me know!) But, as usual .. I digress ... I bought the set and have NEVER used it. I'll betcha $20 it retires this year. It's been around a while now and it is on the SAB list of items you can pick for free. ANYway ... I am now trying to focus more on customer service and that involves putting a little Thank You note in with all of my orders. I stumbled across a cute little card created by Dawn Olchefske (Google dostampingwithdawn or http://www.dostamping.typad.com/) and decided to make one similar for a 3x3 thank you note. Here it is:
Cute, huh? I used some retired Certainly Celery DSP (although I ran out so made more with the current Pear Pizzazz DSP), Daffodil Delight cs and colored with the Celery, Daffodil and Poppy Parade markers, along with the Basic Gray & a blender. I added Poppy Parade to the centre of the daisies on the DPS. Wa-low! I quick, qute than you note. Now I need to mass produce it for my next orders .... 18 more needed!!
Have a great night :)
Tam
Tuesday, March 22, 2011
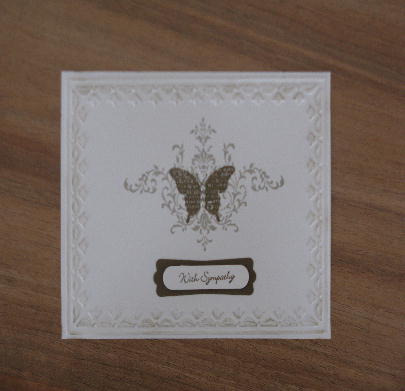
Bliss Sympathy
Hmmm - well THAT just doesn't sound right now, does it? This is a fun, simple little card that we made at my Stamp-a-Stack on Sunday. It's a case from Krista Fenton (http://kristasstampspot.blogspot.com/2011/03/bliss-one-layer-card.html). I just changed the colors. I wanted a simple, striking card that could be used for a wedding, sympathy, birthday, just because ... any occasion - this one really fit the bill (thanks Krista!)
I used the Tulip embossing folder (this is a MUST have item!) along with the Bliss set using Sahara Sand for the flourish and Soft Suede for the butterfly. Punch out whichever sentiment you want from the Teeny Tiny Wishes with your Word Window punch, mat it with Soft Suede with your Modern Label punch and Wa-low! A quick card for any occasion.
I managed to find my craft desk today (as well as the floor of the play room!) The cleaning threw out my back a bit but nothing I can handle :) I'm not sure when I'll get to stamping this week - I volunteered to work the book sale at the girls' school 3 days this week - what was I thinking?! Well, maybe I'll get down there now - I want to whip up some quick Thank You notes for my hostess Wendy and her guests who placed orders. I love making little 3x3 cards - they're just fun :)
Hope you had a fun day -
Tam
Subscribe to:
Posts (Atom)