Thursday, April 28, 2022

Masculine Makes - Stampin' Creative Global Blog Hop

Happy Blog Hop Day!  Every month my friends from around the globe bring your projects centred around a common theme to delight and inspire!  This month the theme is "Masculine Makes".  PERFECT timing, as Craig's birthday is next week and I had nothing made ... although as I type this I realize I didn't actually use a birthday sentiment lol!  Oh well.  Good excuse to do more crafting!!  Here is what I came up with ...


I wish I could tell you the name of the "fold" ... alas, I can't find one! ... so I shall call it the "Box Card".  Creative, eh?  lol.  Friends have told me it is a "Cube Card",  a "Decorative Corner Card", other shave said it's a "Pillar Box Fold" ... so who knows!  I call it pretty! hee hee

I've seen these "cards" before but never made one.  Not sure why!  I stumbled across a VERY old swap in my stash and thought it would be perfect for our Masculine Makes.  Quick and easy yet not to "floofy" for a guy!  I used NEW products from the 2022 - 2023 Annual catalogue (it goes live in less than a week - May 3rd!!!). The products are part of the "He's The Man" suite.  It has AWESOME Designer Paper (complete with TWO sheets of pre-printed die cuts), a stamp set and matching dies (He's All That Bundle) and Rustic Metallic Adhesive Backed Dots ... all for just $94 CDN! (plus tax and shipping).  It is a MUST HAVE Suite of products for ALL your "Masculine Makes"!

This "fold" is SO quick and easy!

You start with your standard half sheet of card stock (Sahara Sand) at 8 1/2" x 5 1/2".
On the 8 1/2" side you score it every 2 1/8" ... so 2 1/8", 4 1/4 and 6 3/8".
You also need a strip of Sahara Sand measuring 1" x 5 1/2", scored along the 1" side at 1/2".
Fold and burnish on all score lines.
Using liquid glue, glue the 1" strip inside the box, forming your sealed cube ...

Then you just decorate!
I used Early Espresso mats measuring 2" x 5 3/8" (you need 4 of them)
I used the He's the Man DSP and cut 3 pieces measuring 1 7/8" x 5 1/4" ... and one Very Vanilla with the same measurements.  
I adhered all layers using Stampin' Seal.
I added some "photo corners" from the new "Fabulous Frames" dies (available May 3rd)
The decorations are made from one of the dies in the "He's All That" Bundle.  The two circles were cut using the FABULOUS new "Stylish Shapes" dies.  
The sentiment is stamped in Early Espresso and comes from the He's All That stamp set.


To attach the circular sentiment piece to the card base you need to punch/die cut two 1" circles (or larger .. whatever you have that is smaller than your sentiment piece.
You fold the circles in half and glue one half of each circle to the sides of your box ... here is one side.  The other side is the same - just make sure you glue your half circle piece on either side of the fold.  I hope that makes sense.


Hopefully it makes sense.  You want the sentiment to be secured to the box but to protrude when the box is open.  So in the picture below, one of the 1" circles is glued to the left side of the centre fold and the second 1" circle is glued to the right hand side of the centre fold.  


The back of the card is where you will write your sentiment.


... and that's it!  REALLY very easy and quick to pull together.  I love this!  Clean, simple and ready to give to your favourite fella!

I normally post links for the products at the end of the post but since 90% of the products aren't available until May 3rd, I can't.  The system I use doesn't have the items populated yet.  If I get a chance I'll come back and update this post in May (after I'm back from vacation!) to make shopping easier for you.  If you are in Canada, don't have a regular Demonstrator that you work with and need one of the new catalogues drop me a line and I'll get one out to you!  You can subscribe to my newsletter over on the left hand side and message me via MailChimp.

So there is my offering for "Masculine Makes".  I hope you like it ... and give it a try!  I'm a little obsessed with it!

Thank you for popping in ... no hop along and see what my friends have to share ... and have a stampy day!


Tamara

Sunday, April 24, 2022

12 Months of Tutorials - Create With Us International Tutorial Bundle Team

Well Happy Sunday!

Wow - can you believe I'm blogging on a Sunday morning? ... just like the old days lol.  EVERY time I DO blog I tell myself I'm going to get back into doing it every Sunday ... alas ... lol.  Maybe in June I'll get back into the habit.  Fingers crossed!

I wanted to pop in to do a post about 12 PDF Tutorials, that have been created over the last year, by my friends around the globe.  We came together last year to form the Create With Us International Tutorial Bundle Team.  I can't BELIEVE it has been over a year since we started!

I am good at CREATING my projects for the tutorials but what I'm NOT very good at is telling people about them .. so here they are, all in one post.

The idea behind these tutorials was that we would put together one document of amazing projects surrounding one particular theme or bundle of products.  We all love to see the versatility of one Suite/Bundle and what better way to showcase them than on a document of 15 projects??

I use the tutorials as a gift to my customers who take my classes, training and/or place orders that are valued at $60 or more in any given month.  I also offer them for sale for $25 CDN.

Several of the Product Suites are retiring at the end of this month (or have already, in the case of some Sale-a-brations or July-Dec Mini Catalogue items) but many of you HAVE these products in your stash so the tutorials are still a great resource to have.

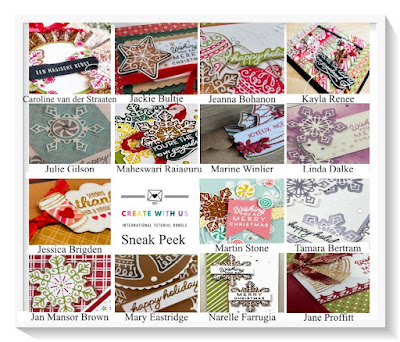
I'm sharing pictures of the projects that I CONTRIBUTED so you can get an idea of the sorts of projects in the entire PDF.  Following those are pictures of "sneak peeks" of all 15 projects in the 12 PDF Tutorials.

Have a snoop and if you're interested, reach out.  You can buy any of them flat out for $25 CDN or you can place an order through my on-line store for $60 or more and get any of them for free.

These are the Suites/Bundles/Themes we used:

  • Sweet Strawberry
  • Pansy Petals
  • Sweet as a Peach
  • Expressions in Ink
  • July - Dec 2021 Mini Catalogue
  • Penguin Place
  • Painted Christmas
  • Gingerbread & Peppermint
  • Heart & Home
  • Sale-a-bratios Jan/Feb 2022
  • Flowering Fields
  • Here Together
Check them out!


This is the amazing team of Demonstrators currently in our group:


So there you have it!  Twelve Tutorials using 12 different Suites/Bundles ... and my first Sunday blog post in forEVAH!  I hope you like the projects.  If you're interested in purchasing any of them, or in getting them for free with a minimum $60 order please get in touch!  My store link is on the right hand side .. or shoot me a comment below.

Thanks for popping in ... and have a super stampy Sunday!


Tam

Monday, April 18, 2022

Alcohol Roses - Kylies Trip Achievers Blog Hop


Happy Blog Hop Day!

Each month my Stampin' Up! Demonstrator friends and I bring you project made with current product to delight and inspire you.  We hope you love what we have created!

This month I wanted to play with a new technique I've seen on social media - you make roses using our Blends Markers and Isopropyl Alcohol.  If you know me you know "fussy" and "organic" are NOT my cup of tea.  I like to be able to control the final look of my project! ... but THIS technique is so fun I have been playing with it all week!  Check out the look of my roses ...


SO FUN!!  

This technique is CRAZY easy - you just need a few supplies - Vellum Paper, our alcohol (Blends) Markers and 99% Isopropyl Alcohol.  The alcohol has to be 91% or higher.  I made a video that I'll link at the end of this post.  I challenge you to try it - it' QUITE addicting!  I used:

Basic White card base - 8 1/2" x 5 1.2"
Old Olive card stock layer - 5 1/4" x 4"
Basic White card stock layer - 5" x 3 3/4"
Vellum layer - 4 3/4" x 3 1/2"

  • In a nutshell, you scribble your blends in a big circle on your vellum.  You then take your alcohol and drip a little onto your scribble.  Using the lowest setting on your heat tool you move the ink/alcohol mixture around until it dries.  As it dries, the colour will pool and create a "vein".  You repeat the process over and over, making smaller and smaller circles in your scribbles and using smaller and smaller drops of alcohol.  Each vein ends up looking like petals of a rose.  I did a similar technique for the leaves, using my dark Old Olive Blend.  I just colour some vellum and, once dried, punched it with my Bough punch.  (In the video you'll see my hot Old Olive mess ... that's what I used to make the leaves)
  • The sentiment is from Flowering Rain Boots, stamped in Old Olive on a 2" x 1 1/4" strip of Old Olive card stock and is popped up on dimensionals.
  • I attached the vellum to the white card base using our Stampin' Seal (I was thrilled to discover you can't see the adhesive through the vellum!) and then popped both the white layer AND the Old Olive layers up on dimensionals. 
  • I finished it off with 5 of our (retiring) Genial Gems.

I LOVE this card!  Yellow Roses signify "Friendship" in the world of flowers.  What a lovely card to mail to a friend.

Give it a go! ... but not before you hop along to see what my friends have created for you.  Enjoy the hop and have a stampy day!


Tamara


Product List