Happy Thursday!
Obviously I didn't manage to post Tuesday as I had hoped ... I can't BELIEVE how crazy busy I've been since I got back from my weekend Getaway to South Carolina! I hit the ground running Monday morning and am only just now starting to catch my breath. Having said that I really only have half an hour before I start running again as it's Alicia's birthday tomorrow and I still don't have a present for her - ACK! I have NEVER left things this late before - I almost always have birthday presetns MONTHS in advance. If I don't have them bought I at least know what I'm getting ... not this time! Toy's R Us opens in 40 minutes and I only have a 1 1/2 hour window to find something! Yes, stress levels are rising *lol*.
So let's backtrack a few weeks. Last week I was crazy busy getting everything in place so I could run away with my husband to South Carolina for our free weekend vacation. Now I KNOW I'm not the only one out there who procrastinates on packing but I really do set my self up for last-minute rushing! Wednesday I had pretty much caught up on all the ESSENTIAL things I needed to do ... wash the sheets for mom before she moved in for the weekend ... do the grocery shopping so she had food to fee the kids ... made the list on how to feed and take care of the cats and dog (and kids!) ... and so on. Now of COURSE when I got up in the morning I probably should have considered packing ... but no. I felt the need to organize my food pantry ... and clean the fridge out ... and naturally organize my Tupperware cupboard. Around noon Craig asked if we had any American money ... ummm ... no - that hadn't even hit my radar ... but my cupboards were tidy *lol* . Hee hee - I just have to laugh at my "quirky" ways sometimes! I started packing somewhere around 6:30 pm. It didn't take as long as usual since I WAS only going for 3 days ... but of course I had to shave my legs, find and organize my "travel purse", pack snacks for the plane (my standard M&M peanuts), charge the camera batteries, fill all my little travel bottles of lotions and shampoo etc, etc, etc. At 8:30 pm Craig announced he was going to bed. BED? It was only 8:30! He pointed out we had to get UP at 2:00 am. Oh - right. I guess I wouldn't go downstairs to finish my little Club Girl treats. I went to bed too. 2);; am came around VERY fast ... but it's funny how getting up at 2:00 am is a lot more "doable" when you are getting on a plane to fly away rather than at 2:00 am when the kids tell you they had a bad dream *lol*!
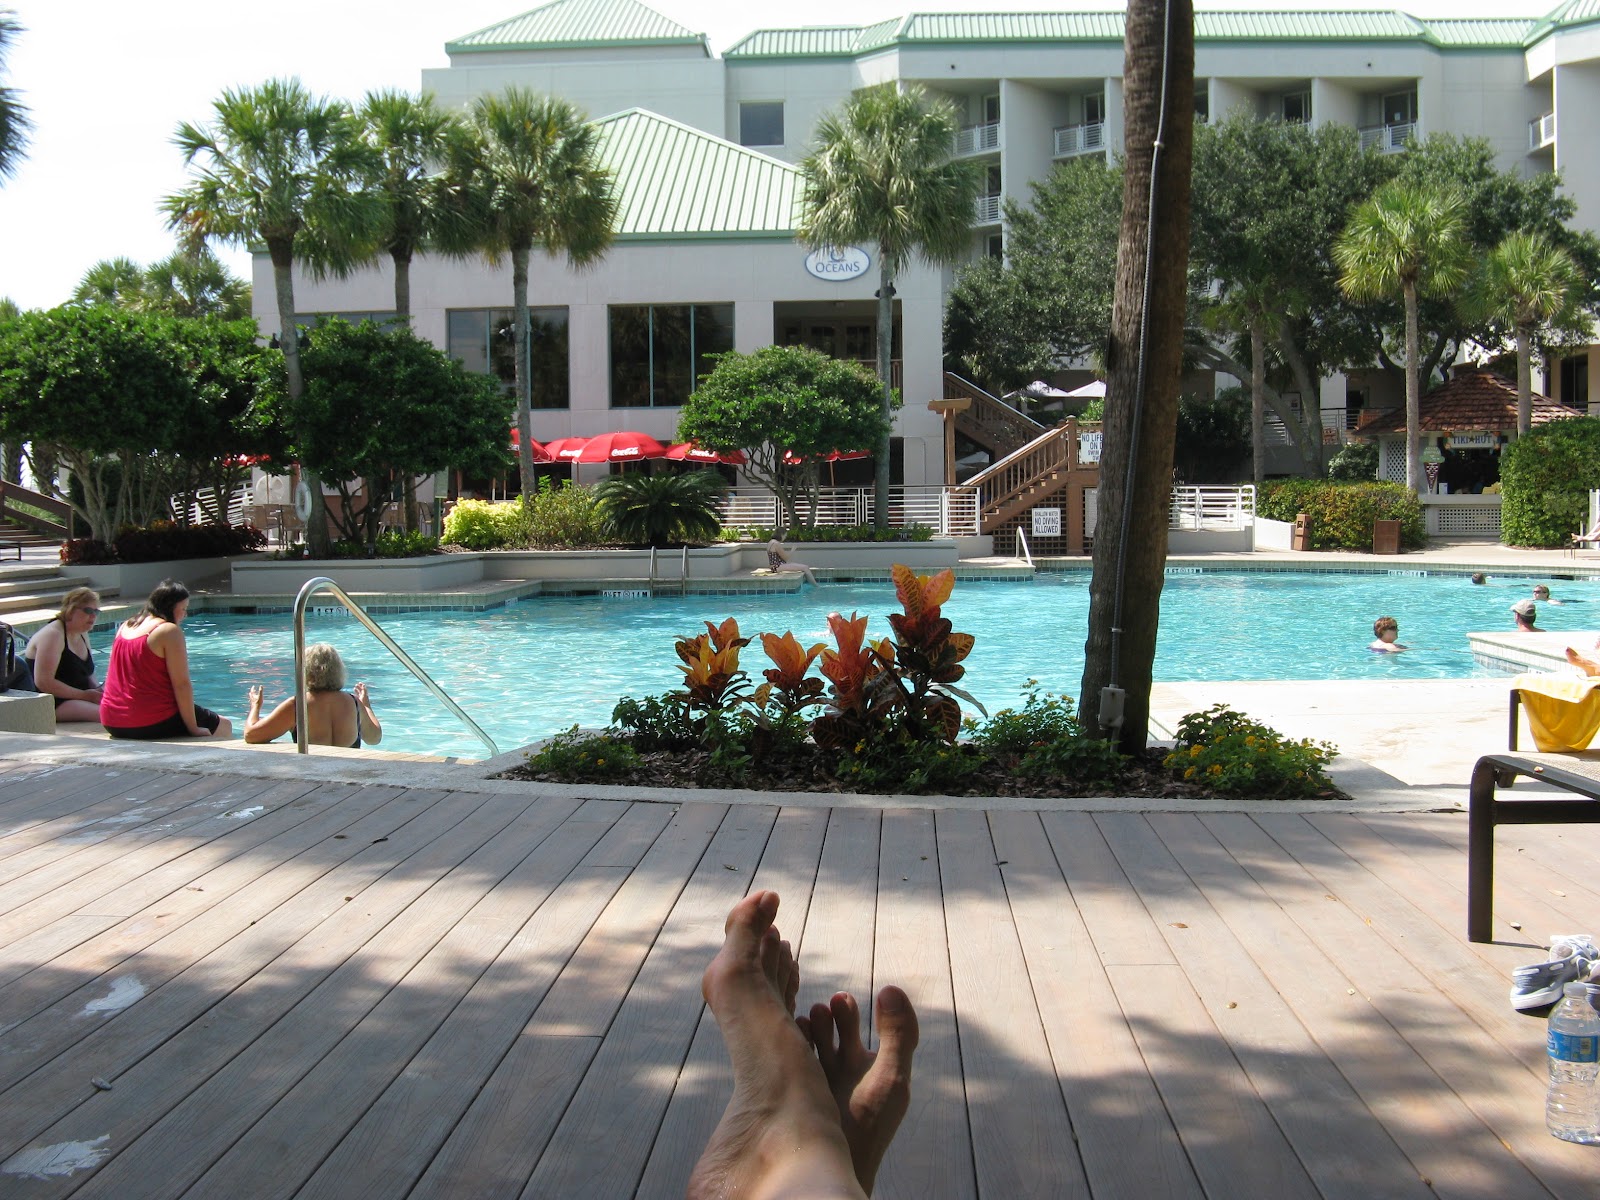
Long story short(er) ... we had a FABULOUS time. I questioned if it was really worth it to fly to the other side of the country for 2 days but once we got there (at 7:00 pm) we had both decided it WAS worth it. What a beautiful place. We stayed at the Westin which was awesome. HUGE room with a king size bed. We had an ocean view and it was SO relaxing. There was NO agenda - no scheduled activities just pure relaxation. I had a great massage on Saturday while Craig lounged at the pool. The food was amazing - fresh sea food every day ... and of course lots of "foo-foo" drinks by the pool. I met lots of great ladies (hi Pat, Sue, Izzy, Susan and Janet!) and saw some stamping "stars" like Becky Roberts and of course Sara Douglas (Shelli's daughter). It was just a great time all around. Every night when we got back to our rooms there were "pillow gifts" from Stampin' Up! We got a great Lands End tote bag, fresh fruit, cheese and bottled water and a craft keeper filled with DSP, a stamp set, ink pads, ribbon, buttons and jewels. It made me feel very special. SU sure do know how to treat their demonstrators! We didn't leave the hotel much - just to walk the beach and stroll through a nearby neighbourhood. It ws positively fabulous! Here are a few pics:
(View from our balcony)
(token food shot!)
Ewwww - a huge Golden Orb Spider in his web outside the front of the hotel
We were both VERY relaxed by the time it came to go home. Sadly the trip home was fairly horrible. We started killing time at 11:30 am until our 1:30 bus ride to the airport. There was a mix up with the buses and we only JUST made our flight with minutes to spare (of course one again I was chosen for the "special" screening at the airport ... I think my bra always sets off their scanners because I had no jewelery on or pockets to hide anything ... of course that ate up even more time. We left at 3:30 pm for the milk run home. On the last (and 3rd) plane of the trip home we were in the air for 45 minutes when it was announced we had to turn around and go BACK due to a problem with the plane. GREAT! We got home 3 hours later than planned ... at 3:30 am. Of course when we got home the dog thought we were burglary so barked ... waking the kids and grandma so everyone was up and we talked until 4:45 am. A quick nap before it was up for school and I haven't stopped since. A blur of laundry, finishing off my Club Girls treats, dinner and Brownies and I finally got to fall into bed. The craziness didn't stop ... Tuesday I had to put right an order error I had made which resulted in me putting 185 km on my vehicle and taking up almost 3 hours of my time. Then it was swimming lessons ... and home for dinner and more "mom" stuff.
Yesterday was "delivery" day which took me all day and then my Team Meeting for stamping. Today is a half day for the kids and yoga tonight with Rebecca. Yep - back to reality - with a BANG! Soooooo ... now that you'e all caught up on my life-craziness lets show you those little treats I made (I now have 11 minutes before Toys R Us open!!!!)
Ta-Da!
Aren't they cute??!! I used my 3 different sized Scalloped Circle punches for his feathers and the 1/4" and 1" circle punches for his body and head. The beak and feet are made from the 5-Petal Flower punch and the waddle is made from the tip of the butterly punch (hee hee - LOVE that part! I taped them all together and the middle is a peppermint patty. I sued the googly eyes from mini (self adhesive eyes ROCK!). I will be using these for place card holders at the dinner table on Thanksgiving. Love them (although making 30 of them took more time than I care to think about!!)
I have another Thanksgiving treat to share made by my friend and Club Member Tammie Morris. Check these out!
LOVE them! The bodies are the Treat Cups filled with fish crackers. She's giving them to the kids at her daughters playschool this morning. I LOVE that she used the ornament punch from the Merry Mini Punch Pack punch for the beaks! Great job Tammie!
Right - I have a Halloween Treat to share but Toys R Us opens in 6 minutes. I better go get my daughter a present or I'll lose my "Mom of the Year" nomination *lol*
Have a stampy day!
Tam
Welcome to my Blog - a place where you can learn how to make quick, cute cards using Stampin' Up! products!
Thursday, October 4, 2012
Monday, October 1, 2012
Hello!
Happy Monday Everyone!
Just a quick note before I Ddrag my exhausted butt to bed. I didn't forget to post today ... I simply ran out of time. We got home from our FABULOUS Getaway Vacation to South Carolina at 3:30 am and to bed at 4:45 am. I was up at 7:00 am and hit the gorund running to bag my orders and finish MOST of my Clubber treats. Dinner followed by Brownies ate up the rest of my day. I've run out of steam after only 2 hours of sleep after our 15 hour day of travel. I have projects, I just need to photograph them and post them so hang in there ... hopefully tomorrow ... but no promises. Grocery shopping, deliveries and swimming will keep me busy until 6:30 pm ... but I'll give it my best shot.
Sheesh! Nothing like hitting the ground running after a VERY relaxing weekend. Funny how it seems like weeks ago already *lol*
Hope you had as great a weekend as I did. I'll post about it just as soon as I get a chance!
Have a stampy night!
Tam
Just a quick note before I Ddrag my exhausted butt to bed. I didn't forget to post today ... I simply ran out of time. We got home from our FABULOUS Getaway Vacation to South Carolina at 3:30 am and to bed at 4:45 am. I was up at 7:00 am and hit the gorund running to bag my orders and finish MOST of my Clubber treats. Dinner followed by Brownies ate up the rest of my day. I've run out of steam after only 2 hours of sleep after our 15 hour day of travel. I have projects, I just need to photograph them and post them so hang in there ... hopefully tomorrow ... but no promises. Grocery shopping, deliveries and swimming will keep me busy until 6:30 pm ... but I'll give it my best shot.
Sheesh! Nothing like hitting the ground running after a VERY relaxing weekend. Funny how it seems like weeks ago already *lol*
Hope you had as great a weekend as I did. I'll post about it just as soon as I get a chance!
Have a stampy night!
Tam
Monday, September 24, 2012
Birthday Invitations
Ha! You thought I forgot, didn't you??!! Nope - didn't foget .. it just took me until 4:52 pm to finish my project ... then I had to make dinner ... then clean up dinner ... then go to Brownies ... then home ... bed time routine and NOW (at 9:58) I get to do some work. Woo Hoo! Living the Dream over here! (in case you missed it, insert sarcastic tone here ...)
It's been a CRAZY week around here! I tell ya .... I'm a little long in the tooth to be this busy every night! We have never BEEN so busy ... and that's the way I like it! I have always said that I would NEVER have my kids in more than 2 activities at 1 time ... and I've stuck to that fairly well. Actually, I've gotten off pretty lightly the last few years. Last year Rebecca didn't WANT to take any extracurricular activities and Alicia was in only in Sparks. They took 5 ski lessons in Nov/Dec but that was it.
This year all hell has broken loose! Alicia and I are in Brownies (I'm an unofficial helper) Mondays - that's our "Special Mommy/Daughter time". Rebecca and I are in yoga Thursdays ... that's OUR Special time ... I have stamping meetings at least 2 out of 4 Wednesdays ... and stamping classes at least 2 out of 4 Fridays ... and at least 2 outside stamping classes per month. That only leaves Sundays blank ... and those may have stamping ... or birthday parties ... or who knows WHAT else ... OH! And we have skiing again come November ... OH! and we start swimming lessons tomorrow. Dear me. I need a vacation. Oh! I have a vacation coming up ... in 2 days ... I'm off to South Carolina for my free Stampin' Up! Getaway Vacation ... too bad I still have to:
Right ... I seem to be working myself up into a tizzy just thinking about it so I better get to bed ... so I can take a nap ... then wake up at 3:00 am and think about it some more ... so ... on with my card!
My goal was to have Alicia's birthday invitations done today. I failed. I made the invitation FRONT ... now I just need to type the details, print it off and tape it down .. then deliver them ... hopefully by Thursday! I like to give mom's 3 weeks notice ... this will be a little less than that ... IF I get it done! Here is the card:
Obviously we have a Waterfall Card :) We are going with a "Pretty Sweet" party theme this year. It's a home party (my favorite kind!) where the girls will all dress up "fancy" and will be bombarded with more sugar than they know what to do with! Two of Alicia's favorite things are "dressing up fancy" and "candy" ... hence the theme ... Pretty Sweet (HA! Sometimes I marvel at my fabulousness!) We will have a chocolate fountain and cake/ice cream will have a candy buffet to sprinkle on top. Of course there will be a "pee-yata" as Alicias calls Pinatas ... and loot bags filled with bling and sugar ... and then I get to send them all home! Aren't I clever ... and evil at the same time! Bwahahahahah! I think I posted the instructions for a waterfall card last week .. oh ya - I did ... and then gave you a link to a great tutorial on Splitcoast Stampers *lol* Check it out if you need instructions. These really are fun to make. For this one I used the "Dress Up" set and the "Your Invited" is from "Hugs and Kisses" - a retired set I'll never part with .. I use this particular stamp twice a year!
OK ... 10:21 .. well past my bed time ... and from the list above I think tomorrow is gunna be a busy day!
Oh ... and I doubt I'll post next Monday ... since I'm busy all week and gone all weekend (due back in the wee hours Monday morning) not much crafting will get done. Hopefully Tuesday, though ... I do have some half done projects that need to be done for my Club Gals (hence my 40 Halloween Treats notes above!)
Have a stampy week!
Tam
It's been a CRAZY week around here! I tell ya .... I'm a little long in the tooth to be this busy every night! We have never BEEN so busy ... and that's the way I like it! I have always said that I would NEVER have my kids in more than 2 activities at 1 time ... and I've stuck to that fairly well. Actually, I've gotten off pretty lightly the last few years. Last year Rebecca didn't WANT to take any extracurricular activities and Alicia was in only in Sparks. They took 5 ski lessons in Nov/Dec but that was it.
This year all hell has broken loose! Alicia and I are in Brownies (I'm an unofficial helper) Mondays - that's our "Special Mommy/Daughter time". Rebecca and I are in yoga Thursdays ... that's OUR Special time ... I have stamping meetings at least 2 out of 4 Wednesdays ... and stamping classes at least 2 out of 4 Fridays ... and at least 2 outside stamping classes per month. That only leaves Sundays blank ... and those may have stamping ... or birthday parties ... or who knows WHAT else ... OH! And we have skiing again come November ... OH! and we start swimming lessons tomorrow. Dear me. I need a vacation. Oh! I have a vacation coming up ... in 2 days ... I'm off to South Carolina for my free Stampin' Up! Getaway Vacation ... too bad I still have to:
- practice Alicia's spelling words with her
- volunteer for Rebecca's field trip tomorrow
- take the kids to swimming tomorrow
- shop for food for while grandma, grandpa and Uncle are here watching the girls
- place a stamping order
- make 40 Halloween Treats
- finish Alicia's birthday invitations
- make 80% of the girls' lunches for Friday
- what time the girls go to bed
- Pack for the girls to sleep over at Grandma's on Wednesday
- PACK!!!
- where we keep the cat food
- how much to feed the cat
- where we keep the dog food
- how much to feed the dog
- what time school starts for the kids
- what time to pick the kids up from school
- where to go for the girls' school Mime production on Friday (and where to park)
- what to pack the girls for lunch on Friday
- how to dog-proof the house when they go out
- how to set the alarm when they go out
- how to turn the alarm off when they come home
- how to work the 6 remote controls on the TV
- hpw tp get ahold of us at the resort (although I think I'm going to accidentally/on purpose forget this one!!)
Right ... I seem to be working myself up into a tizzy just thinking about it so I better get to bed ... so I can take a nap ... then wake up at 3:00 am and think about it some more ... so ... on with my card!
My goal was to have Alicia's birthday invitations done today. I failed. I made the invitation FRONT ... now I just need to type the details, print it off and tape it down .. then deliver them ... hopefully by Thursday! I like to give mom's 3 weeks notice ... this will be a little less than that ... IF I get it done! Here is the card:
Obviously we have a Waterfall Card :) We are going with a "Pretty Sweet" party theme this year. It's a home party (my favorite kind!) where the girls will all dress up "fancy" and will be bombarded with more sugar than they know what to do with! Two of Alicia's favorite things are "dressing up fancy" and "candy" ... hence the theme ... Pretty Sweet (HA! Sometimes I marvel at my fabulousness!) We will have a chocolate fountain and cake/ice cream will have a candy buffet to sprinkle on top. Of course there will be a "pee-yata" as Alicias calls Pinatas ... and loot bags filled with bling and sugar ... and then I get to send them all home! Aren't I clever ... and evil at the same time! Bwahahahahah! I think I posted the instructions for a waterfall card last week .. oh ya - I did ... and then gave you a link to a great tutorial on Splitcoast Stampers *lol* Check it out if you need instructions. These really are fun to make. For this one I used the "Dress Up" set and the "Your Invited" is from "Hugs and Kisses" - a retired set I'll never part with .. I use this particular stamp twice a year!
OK ... 10:21 .. well past my bed time ... and from the list above I think tomorrow is gunna be a busy day!
Oh ... and I doubt I'll post next Monday ... since I'm busy all week and gone all weekend (due back in the wee hours Monday morning) not much crafting will get done. Hopefully Tuesday, though ... I do have some half done projects that need to be done for my Club Gals (hence my 40 Halloween Treats notes above!)
Have a stampy week!
Tam
Wednesday, September 19, 2012
The Open Sea ... Again!
Happy Wednesday!
Hope you're havin' a good one! I'm happy to say my meeting starts in 45 minutes and I'm all ready to go. See? I knew it would all get done in time ... *lol* Having said that, last night was a lot longer than I wanted it to be! Alicia had her first Brownies meeting. I assumed it was an hour long and had hoped to hit Costco afterwards. No such luck - the meeting was 1 1/2 hours long so Costco was pushed to today. Once we got home it was the bed time run around ... then, at 9:00 pm I had to head down to the craft room to a) finish off my swaps and b) design the Make-and-Take for tonight. Ack! I needed a great crad FAST! Pinterest to the rescue! As you know from my last post, The Open Sea was a set I hadn't bought until recently ... I spotted this card on Pinterest a while back and it was one of the deciding factors in me buying the set. I can take NO credit what-so-ever for it. I cased it 100% from the original creator, Deb Fearns (debfearns.wordpress.com). Check it out:
Love it! SO simple ... yes, this one just might make it into my Stamp-a-Stack in October as the "masculine" birthday card. I simply masked off the stamped image with some thin loose leaf paper. I stamped various images with Crumb Cake and then the compass in Soft Suede. Next I took my sponges and sponged Crumb Cake and Soft Sued to get that tea-stained look. I stamped the clobe and compass at the bottom in Crumb Cake and the sentiment (Bring on the Cake) in Soft Suede. The anchor is Suede as well and punched with the large tag punch. I used the retired hemp twine on it only because I couldn't find my linen thread! That was it! We are making this card tonight ... in 36 minutes to be precise! Wish me luck on my first "official" team meeting.
I'll leave you with a very long piece that I wrote last night ... from 10:40 until 11:20 pm ...
Alicia lost her tooth the day before yesterday. Apparently the Tooth Fairy was VERY tired and overworked because she completely forgot to come to our house to take her tooth and leave the money! Well! That error had to be rectified. This is what Alicia found when she woke up this morning ... enjoy it ... and have a stampy night :)
Hope you're havin' a good one! I'm happy to say my meeting starts in 45 minutes and I'm all ready to go. See? I knew it would all get done in time ... *lol* Having said that, last night was a lot longer than I wanted it to be! Alicia had her first Brownies meeting. I assumed it was an hour long and had hoped to hit Costco afterwards. No such luck - the meeting was 1 1/2 hours long so Costco was pushed to today. Once we got home it was the bed time run around ... then, at 9:00 pm I had to head down to the craft room to a) finish off my swaps and b) design the Make-and-Take for tonight. Ack! I needed a great crad FAST! Pinterest to the rescue! As you know from my last post, The Open Sea was a set I hadn't bought until recently ... I spotted this card on Pinterest a while back and it was one of the deciding factors in me buying the set. I can take NO credit what-so-ever for it. I cased it 100% from the original creator, Deb Fearns (debfearns.wordpress.com). Check it out:
Love it! SO simple ... yes, this one just might make it into my Stamp-a-Stack in October as the "masculine" birthday card. I simply masked off the stamped image with some thin loose leaf paper. I stamped various images with Crumb Cake and then the compass in Soft Suede. Next I took my sponges and sponged Crumb Cake and Soft Sued to get that tea-stained look. I stamped the clobe and compass at the bottom in Crumb Cake and the sentiment (Bring on the Cake) in Soft Suede. The anchor is Suede as well and punched with the large tag punch. I used the retired hemp twine on it only because I couldn't find my linen thread! That was it! We are making this card tonight ... in 36 minutes to be precise! Wish me luck on my first "official" team meeting.
I'll leave you with a very long piece that I wrote last night ... from 10:40 until 11:20 pm ...
Alicia lost her tooth the day before yesterday. Apparently the Tooth Fairy was VERY tired and overworked because she completely forgot to come to our house to take her tooth and leave the money! Well! That error had to be rectified. This is what Alicia found when she woke up this morning ... enjoy it ... and have a stampy night :)
Tuesday,
September 18, 2012
Dear Alicia,
I wanted to write you a little
note to apologize for not visiting you last night. I tried my very best but a few funny things
happened on the way to your pillow ...
I set off from my secret castle
(which is that TINY shining star just to the right of the moon) with my list of
children who had lost a tooth yesterday.
Of course you were on the list (... on page 2 since the children are
listed in alphabetical order ...) I made
my first 16 stops successfully ... then I got to #17 on the list ... a little
boy named Billy Bertran (he lives in Winnipeg).
That’s when everything went terribly wrong!
I found Billy’s house, but I had
to spend a LONG time trying to get into it!
All the windows and doors were shut tight and they didn’t have a
fireplace! I can usually find a way in
through the dryer vent but there was a big nasty SPIDER WEB blocking my
way! You can imagine how much I hate
spider webs!! I had to fly around his
house 4 TIMES before I finally spotted a cat flap at the back door ... but I
wasn’t strong enough to push it open!
That’s when things got REALLY crazy!
My other tooth fairy friends were all busy with their own long lists of
children to visit so no one could come and help me with the door. I had to think of something else. I flew around the yard a few times and then
spotted a dragon fly sitting on the fence.
I asked if he could help me ... but he couldn’t. His wing got hurt earlier in the day by Billy’s
cat and until it healed he could only fly in circles. I flew around some more looking for someone
else who might be able to help me. I
found someone alright ... but not someone I wanted to find! I rounded the shed and bumped smack into Mr.
Squinkles ... Billy’s CAT!! Well! I don’t know who was more startled him or me
but let me tell you I took off just as fast as I could fly!! For a big old fat cat that grey fur-ball
could really move!! I flew up to the
roof of the house to catch my breath and think.
There was only one thing I could do.
I would have to get Mr. Squinkles to open the cat flap FOR me! I flew down so I was just out of reach but so
he could see me. He saw me all
right! I flew over towards the house and
hovered just in front of his cat flap.
JUST as he tried to pounce on me I flew straight up ... he went flying
through the cat flap and went skidding across the kitchen floor. Before the flap could close again I darted in
after him and hid in the fruit bowl.
When the coast was clear I made my way up to Billy’s room. Thinking the worst was over I tiptoed over to
his pillow ... and got stuck! Billy had
been eating honey toast in bed and had dripped honey beside his pillow! When I stepped in it I got stuck! What a mess!
I thought I was going to have to stay there all night. Luckily Billy had a light beside his
bed. I realized I could use the heat
from the lamp to get free! I held my
little wand at just the right angle so the light from the lamp shone through
the glass tip of the wand and melted the honey!
Phew! That was a close one! I grabbed Billy’s tooth, left him a quarter
(it wasn’t a very CLEAN tooth!) and got the heck out of there before something
else could happen. My next problem ...
how to get OUT of the house! I was now
REALLY behind schedule and needed to hurry.
The only thing to do to get out was the same thing I had to do to get
in. I had to get Mr. Squinkles to chase
me. I found him napping in a basket of
clean laundry and had to tickle his ear to wake him up. That did the trick! He chased me all right! What I DIDN’T know was that Mr. Squinkles has
a brother ... Mr. Puss Puss ... and I didn’t know that Mr. Puss Puss was still
outside ... on the other side of the cat flap!
Mr. Squinkles tried to pounce on me ... I flew out of the way – he went
flying through the flap ... I followed before the flap could close ... but then
Mr. Puss Puss pounced on me as soon as I was outside!! He caught me by the wing! I couldn’t wiggle free and didn’t want to
hurt my wing ... so I poked him in the nose with Billy’s tooth. He was so surprised he opened his mouth and I
managed to fly away.
So! I was now quite rattled and VERY behind
schedule. Once I caught my breath I got
my list of directions to get to YOUR house but just then the wind gusted and
blew it right out of my hands! I chased
it for BLOCKS but just as I was about to grab it the paper landed in a puddle
of water. I picked it up but all the
writing was smudged and I couldn’t read a single name. I had to go home to get a new list but by the
time I got there your sister Rebecca was already awake and I couldn’t take the
chance of being spotted ... so I had to wait until tonight to get your tooth.
I’m sorry. I know you must have been disappointed this
morning when you saw I hadn’t come to visit you. I hope this explains why and that you will
forgive me. I’m leaving you and extra
dollar to try to make up for it. I hope
you aren’t mad at me. I think your tooth
is very nice ... it’s the shiniest one I collected all week!
Be sure to keep brushing and
SMILE! Nothing is more beautiful than a
smiling child!
Love,
The Tooth Fairy
Monday, September 17, 2012
The Open Sea
Happy Monday!
Phew ... got my post in just under the wire (told you I'd do it, Casey!!) I haven't been particularly productive today in the old crafting front but oh well ... I still have until Wednesday to do about 10 major projects ... so no rush *lol* What I REALLY need to focus on tomorrow is organizing my very first Team Meeting that I'm holding Wednesday night. Woo Hoo! I'm really excited about it - it's going to be a lot of fun! ... that is if I have things to show, share, swap, make, give away and eat by then!! The clock is tickin' so I better get on with it!
I spend about an hour and a half trying to come up with a card for our swap on Wednesday. Luckily we only need to make 8 so it can be a little more elaborate than, say, for 100 at Convention! I wanted to use The Open Sea set that I ordered only recently (I received some great swaps and convention and have seen so many great samples on Stampin' Connection that I broke down and bought it). I was hoping for a quick, easy, stunning card ... like my Clockworks card from last week. Alas it wasn't such a quick process! I totally overthought everything and ended up fiddling WAY too long with it. I wasn't sure I liked the end result until I stepped away for a few hours and then took another look. Yep - I think it's a good swapper. Lookie:
As usual the lighting is off ... you can't see the color too well ... it is Very Vanilla and Not Quite Navy card stock; Crumb Cake, Not Quite Navy and Early Espresso ink. I stamped the various images on the vanilla in the crumb cake. You can't see the depth in this picture so here is a blurry, shadowy side picture to show how I layered some pieces:
I stamped the globe image on both the base piece and a scrap piece of vanilla and punched it out with the 1 3/4" circle and popped it up on dimensionals. I cute the ship out and popped it up. I stamped the compass image on the base piece in Espresso and then again on a scrap piece and punched it out with the 3/4" circle punch and popped it up with dimensionals. I stamped the Happy Birthday (from Perfect Punches) in Not Quite Navy and punched it out with the Extra Large Oval Punch and popped IT up with dimensionals. I spend about 45 minutes with the anchor and Espresso Baker's Twine trying to get that just right. Yes, I popped it up with dimensionals. Just when I thought I was done I thought it lookd too "clean" so I attacked it with my sander, finger nail, sponges and finger daubers to distress it. I'm done but it wasn't a quick or easy process!
Apparently I now have to go "verse" Alicia on the Wii before bed time ... then it's back to the craft room to work on those 10 other things.
Thanks for popping in - have a stampy week!
Tamara
Phew ... got my post in just under the wire (told you I'd do it, Casey!!) I haven't been particularly productive today in the old crafting front but oh well ... I still have until Wednesday to do about 10 major projects ... so no rush *lol* What I REALLY need to focus on tomorrow is organizing my very first Team Meeting that I'm holding Wednesday night. Woo Hoo! I'm really excited about it - it's going to be a lot of fun! ... that is if I have things to show, share, swap, make, give away and eat by then!! The clock is tickin' so I better get on with it!
I spend about an hour and a half trying to come up with a card for our swap on Wednesday. Luckily we only need to make 8 so it can be a little more elaborate than, say, for 100 at Convention! I wanted to use The Open Sea set that I ordered only recently (I received some great swaps and convention and have seen so many great samples on Stampin' Connection that I broke down and bought it). I was hoping for a quick, easy, stunning card ... like my Clockworks card from last week. Alas it wasn't such a quick process! I totally overthought everything and ended up fiddling WAY too long with it. I wasn't sure I liked the end result until I stepped away for a few hours and then took another look. Yep - I think it's a good swapper. Lookie:
As usual the lighting is off ... you can't see the color too well ... it is Very Vanilla and Not Quite Navy card stock; Crumb Cake, Not Quite Navy and Early Espresso ink. I stamped the various images on the vanilla in the crumb cake. You can't see the depth in this picture so here is a blurry, shadowy side picture to show how I layered some pieces:
I stamped the globe image on both the base piece and a scrap piece of vanilla and punched it out with the 1 3/4" circle and popped it up on dimensionals. I cute the ship out and popped it up. I stamped the compass image on the base piece in Espresso and then again on a scrap piece and punched it out with the 3/4" circle punch and popped it up with dimensionals. I stamped the Happy Birthday (from Perfect Punches) in Not Quite Navy and punched it out with the Extra Large Oval Punch and popped IT up with dimensionals. I spend about 45 minutes with the anchor and Espresso Baker's Twine trying to get that just right. Yes, I popped it up with dimensionals. Just when I thought I was done I thought it lookd too "clean" so I attacked it with my sander, finger nail, sponges and finger daubers to distress it. I'm done but it wasn't a quick or easy process!
Apparently I now have to go "verse" Alicia on the Wii before bed time ... then it's back to the craft room to work on those 10 other things.
Thanks for popping in - have a stampy week!
Tamara
Monday, September 10, 2012
Waterfall Fun!
HAPPY MONDAY!!!
If you live in Edmonton you'll know that I'm having a GREAT day!! Not only is it Monday (my favorite day of the week) but it's a cold, RAINY Monday ... what better weather for cleaning, organizing and crafting??? I got SO much off my To-Do list today I can't STAND it! Yep ... another 3 days like today and I'd be ahead of the game! I'm pretty sure I'll be able to sleep for the first time in weeks now that my plate seems to be at a manageable level again. Phew!
Soooo - today I'm sharing another 2 cards we made at Technique Class on Friday (and will do again on Wednesday, if you want to come!) First up is a VERY simple ... and rather pathetic ... card - I just threw it into the mix as a bonus 4th project to show-case another watercolor crayon technique. Don't laugh ... at it, K?
I mean REALLY! Does it get any more basic than that? *lol* I think I may have taken "Quick and Simple" to the far OTHER extreme ... now I better start working on making cards a little more complex again *lol* For this one I scribbled the watercolor crayons directly onto my clear block, spritzed it with water (very little and from far away!!) and then used the block as a stamp to get the colored squares ... one is in Baja Breeze, one in Sahara Sand and one in Bravo Burgundy. I stamped the Just Believe image in black Staz-on. That's it! I didn't even put a sentiment on it! I figure this one could be used just blank ... we all need a card now and then without anything on it ... maybe to mail a cheque or a photo ... this one fits the bill!
OK - now on to a much more time-consuming card. I made a Halloween Waterfall card. Lookie:
OK ... try to follow along on this one ... feel free to take notes ... here goes ...
http://www.splitcoaststampers.com/resources/tutorials/waterfall_card/
I think that's it! 6:00 pm and I still have the whole evening ahead of me! I'm on a roll, Baby!
Stay warm and have a stampy night!
Tam
If you live in Edmonton you'll know that I'm having a GREAT day!! Not only is it Monday (my favorite day of the week) but it's a cold, RAINY Monday ... what better weather for cleaning, organizing and crafting??? I got SO much off my To-Do list today I can't STAND it! Yep ... another 3 days like today and I'd be ahead of the game! I'm pretty sure I'll be able to sleep for the first time in weeks now that my plate seems to be at a manageable level again. Phew!
Soooo - today I'm sharing another 2 cards we made at Technique Class on Friday (and will do again on Wednesday, if you want to come!) First up is a VERY simple ... and rather pathetic ... card - I just threw it into the mix as a bonus 4th project to show-case another watercolor crayon technique. Don't laugh ... at it, K?
I mean REALLY! Does it get any more basic than that? *lol* I think I may have taken "Quick and Simple" to the far OTHER extreme ... now I better start working on making cards a little more complex again *lol* For this one I scribbled the watercolor crayons directly onto my clear block, spritzed it with water (very little and from far away!!) and then used the block as a stamp to get the colored squares ... one is in Baja Breeze, one in Sahara Sand and one in Bravo Burgundy. I stamped the Just Believe image in black Staz-on. That's it! I didn't even put a sentiment on it! I figure this one could be used just blank ... we all need a card now and then without anything on it ... maybe to mail a cheque or a photo ... this one fits the bill!
OK - now on to a much more time-consuming card. I made a Halloween Waterfall card. Lookie:
OK ... try to follow along on this one ... feel free to take notes ... here goes ...
- Start with your standard 5 1/2" x 4 1/4" base.
- Take a 2" x 5" strip of Whisper White and run it through your Spider Web embossing folder.
- Cut a strip of black 1" x 4 1/4". (This is the thin strip you see with brads on it).
- Now cut a strip of black 2" x 9" and score it at 2", 2 3/4", 3 1/2" and 4 1/4". Fold on each of the score lines
- Cut (4) colored squares (Old Olive and Rich Razzleberry) 2 1/4" x 2 1/4". Cut (4) whisper white scquares 2" x 2".
- Stamp images on the WW squares - I used images from Wicked Cool. Attach the WW squares to the colored squares.
- Attach your thin 1" x 4 1/4" strip of black to the base using sticky strip and/or brads ... BUT ONLY APPLY TAPE AND BRADS NEAR THE EDGES. You DON'T want any adhesive in the middle of the strip!
- Slide your 2" x 9" strip underneath your 1" x 4 1/4" strip - the "unscored" section goes under the thin strip ... the scored sections will fold over the TOP of the thin strip.
- Apply some sticky strip to the top of the thin 1" x 4 1/4" strip - centre and attach the 2" x 9" piece to it.
- Starting from the bottom score line, atach your colored squares. Line up the top of the colored square with the score line. Attach all 4 squares.
- On my card I simply drew an arrow (with my white gel pen) on the black strip to indicate the recipient should pull it. You could also punch a hold and attach a piece of ribbon to it.
http://www.splitcoaststampers.com/resources/tutorials/waterfall_card/
I think that's it! 6:00 pm and I still have the whole evening ahead of me! I'm on a roll, Baby!
Stay warm and have a stampy night!
Tam
Saturday, September 8, 2012
Watercolor Crayon Fun!
Happy Saturday
Hope you're having a great day enjoying this AMAZING weather!! I just LOVE warm fall days ... fall is by FAR my favorite season!!
I find myself wandering around aimlessly today ... I'm REALLY tired after too many nights with very little sleep.
Yesterday I think I was awake 21 hours straight. Needless to say I'm a bit of a waste of makeup today so I better keep the rambling to a minimum ... long sentences are not my forte today *lol*
Soooo ... last night was my Technique Class. HURRAY! I've SO missed have "my girls" over the last few months for stamping and laughs. We also had some new faces which added to a great night. Today's post is one of the cards we made in class. I had a request to do something with the watercolor crayons for our technique. UGH! Of course I OWN all of them ... but I think I had only used them once ... I had determined that watercoloring wasn't for me. It's a great look and I can see how people could really get "lost" in the relaxing art form but I"m anything but a relaxed personality and don't generally have the patience to play around when I stamp ... so the crayons have sat ... and sat ... and sat. I was determined to come up with a project I liked. After about 20 minutes I was cursing quite a bit and contemplating switching techniques. I gave it one more crack ... headed to the computer for some R&D and inspiration then back down to the craft room to "play". It took me about half an hour before I hit on something I liked. As often happens, it started as what I thought was a mistake. I didn't thrown my paper away, though (watercolor paper isn't cheap ya know!) and stamped a second image on the paper ... hey ... that didn't look too bad ... I tried a third image and Wa-low! I had a great card take shape. 3 minutes later I was smiling and liking my watercolor crayons ... I just may take them out more often now *lol*. Here is the card:
There are quite a few different techniques you can use with the crayons. For this card I color directly on the stamp with them. The top leaf (fro Gently Falling) was done in More Mustard and then Always Artichoke along the right edges of the leaf. The second one is Old Olive and Always Artichoke and the third is Cajun Craze and Bravo Burgundy. Once you color the stamp you hold it arm's length away from you and spritz it 2 or 3 times with a fine water mist. I found the wetter the better ... it took a little longer to dry but I really like the effect it gave. The sentiment is from Pursuit of Happiness and is in Early Espresso. I added some buttons and I was done! I encourage you to take out your toys and play around with them like I did ... yes I ended up with a sheet of stamped images that will end up in the garbage but in the end I found a few ways to use my crayons ... a few ways NOT to use my crayons and I really did enjoy the process (once I calmed down, took a few deep breaths and tried not to rush the creative process!)
So much for a short post *lol* ... you know I struggle with that ;)
Enjoy the weekend ... and have a stampy day!
Tam
Hope you're having a great day enjoying this AMAZING weather!! I just LOVE warm fall days ... fall is by FAR my favorite season!!
I find myself wandering around aimlessly today ... I'm REALLY tired after too many nights with very little sleep.
Yesterday I think I was awake 21 hours straight. Needless to say I'm a bit of a waste of makeup today so I better keep the rambling to a minimum ... long sentences are not my forte today *lol*
Soooo ... last night was my Technique Class. HURRAY! I've SO missed have "my girls" over the last few months for stamping and laughs. We also had some new faces which added to a great night. Today's post is one of the cards we made in class. I had a request to do something with the watercolor crayons for our technique. UGH! Of course I OWN all of them ... but I think I had only used them once ... I had determined that watercoloring wasn't for me. It's a great look and I can see how people could really get "lost" in the relaxing art form but I"m anything but a relaxed personality and don't generally have the patience to play around when I stamp ... so the crayons have sat ... and sat ... and sat. I was determined to come up with a project I liked. After about 20 minutes I was cursing quite a bit and contemplating switching techniques. I gave it one more crack ... headed to the computer for some R&D and inspiration then back down to the craft room to "play". It took me about half an hour before I hit on something I liked. As often happens, it started as what I thought was a mistake. I didn't thrown my paper away, though (watercolor paper isn't cheap ya know!) and stamped a second image on the paper ... hey ... that didn't look too bad ... I tried a third image and Wa-low! I had a great card take shape. 3 minutes later I was smiling and liking my watercolor crayons ... I just may take them out more often now *lol*. Here is the card:
There are quite a few different techniques you can use with the crayons. For this card I color directly on the stamp with them. The top leaf (fro Gently Falling) was done in More Mustard and then Always Artichoke along the right edges of the leaf. The second one is Old Olive and Always Artichoke and the third is Cajun Craze and Bravo Burgundy. Once you color the stamp you hold it arm's length away from you and spritz it 2 or 3 times with a fine water mist. I found the wetter the better ... it took a little longer to dry but I really like the effect it gave. The sentiment is from Pursuit of Happiness and is in Early Espresso. I added some buttons and I was done! I encourage you to take out your toys and play around with them like I did ... yes I ended up with a sheet of stamped images that will end up in the garbage but in the end I found a few ways to use my crayons ... a few ways NOT to use my crayons and I really did enjoy the process (once I calmed down, took a few deep breaths and tried not to rush the creative process!)
So much for a short post *lol* ... you know I struggle with that ;)
Enjoy the weekend ... and have a stampy day!
Tam
Thursday, September 6, 2012
Clockworks
Happy Thursday!!!
Ahhh - what a lovely day :) Today everything pretty much went to plan. Now that school is back in, my plan is to get up when Craig leaves (at 6:30 am), shower, get ready, make my bed, drink my coffee in peace, get the girls up and off, walk the dog, eat my breakfast and then work from 10:00 am until 1:00 pm. Today it went off like clockwork! I was ready for work by 9:59!! ... ok ... so I almost forgot to pick up the kids from school (early dismissal) and after we got home I worked again from 12:30 until 3:00 pm but that's ok! Not only did I still manage to get dinner on the table but I spent an hour finishing off a game of Monopoly with Rebecca!
So .... speaking of clockwork ... I have a new favorite card! ... and it just HAPPENS to be made with the new "Clockworks" stamp set! I was inspired by this fabulous card I saw on our SU website made by Australian Demonstrator Carolyn King. Check this beauty out!
Isn't is great??!! There is a LOT going on with this card ... and I wanted to use it for my Technique Class tomorrow so I needed to streamline it a bit. Here is my version ...
LOVE it! Yep - my new favorite *lol* Once again my photo lighting leaves a lot to be desired! I used Early Espresso and Not Quite Navy inks and card stock. The sentiment is the single Happy Birthday stamp on page 44 (only $8.95!) and the set is ... well, obviously .. Clockworks ... page 105 of the catty. I used the 1 1/4", 1", and 3/4" circle punches for the cogs and watch. I also used an antique brad for the centre of the watch.
That's it for now! I have to go play Play-Doh with Alicia now. I have 3 other projects to share so pop back soon - have a stampy night!
Tam
Ahhh - what a lovely day :) Today everything pretty much went to plan. Now that school is back in, my plan is to get up when Craig leaves (at 6:30 am), shower, get ready, make my bed, drink my coffee in peace, get the girls up and off, walk the dog, eat my breakfast and then work from 10:00 am until 1:00 pm. Today it went off like clockwork! I was ready for work by 9:59!! ... ok ... so I almost forgot to pick up the kids from school (early dismissal) and after we got home I worked again from 12:30 until 3:00 pm but that's ok! Not only did I still manage to get dinner on the table but I spent an hour finishing off a game of Monopoly with Rebecca!
So .... speaking of clockwork ... I have a new favorite card! ... and it just HAPPENS to be made with the new "Clockworks" stamp set! I was inspired by this fabulous card I saw on our SU website made by Australian Demonstrator Carolyn King. Check this beauty out!
Isn't is great??!! There is a LOT going on with this card ... and I wanted to use it for my Technique Class tomorrow so I needed to streamline it a bit. Here is my version ...
LOVE it! Yep - my new favorite *lol* Once again my photo lighting leaves a lot to be desired! I used Early Espresso and Not Quite Navy inks and card stock. The sentiment is the single Happy Birthday stamp on page 44 (only $8.95!) and the set is ... well, obviously .. Clockworks ... page 105 of the catty. I used the 1 1/4", 1", and 3/4" circle punches for the cogs and watch. I also used an antique brad for the centre of the watch.
That's it for now! I have to go play Play-Doh with Alicia now. I have 3 other projects to share so pop back soon - have a stampy night!
Tam
Tuesday, September 4, 2012
1st Day of School
Happy Tuesday! ... well ... happy and sad ... happy to start to get back to a few routines (like eating PROPER meals at NORMAL times and getting kids in bed at a reasonable hour!) but sad that my girls are growing up. Sigh. The first day of school doesn't usually make me sad ... it usually has be stressed out ... and sometimes worried (Rebecca's anxieties usually flare up BIG time this time of year) but today I'm just sad. Grade 2 and 4. 4! That just seems to be so much higher than Grade 3 ... I can't quite get my head around it. I reacted this way when Rebecca turned 1. After her little party I sat down and had a big old cry-fest. Then on her first day of playschool I had another one. I didn't cry today (well not YET, anyway!) but it's just another milestone ... another chapter. Of course I'm happy about a new chapter and looking forward to all the fun and adventure ahead of us but I'm also mourning the closing of the old chapter. My babies are growing up. It won't be long before their hormones are raging ... I'll be their "stupid Mom" and they won't want to have much to do with me. That's why I took this summer to truly "be" with them ... and why last night I snuggled them to sleep ... rubbing their backs and watching their little faces. These are the moments ...
Sigh ...
Right - enough of that before I start bawling! On to crafts!
I made it downstairs yesterday afternoon to work on my 1st Day of School cards ... nothing like leaving those to the last minute, eh? *lol* Happily it took me all of about 15 minutes to put it together. Yep ... I'm getting much better at the quick and easy!
Fairly appropriate, no? 4 apples (from the retired Tart & Tangy) stamped in Crumb Cake, Real Red and Gumball green. (I got the color combination from my Color Coach ... again! Where would I be without that tool?? I honestly use it on about 90% of my cards ... no word of a lie!) The alphabet and "first day of school" are from the retired "First Day" set (I think that's what it's called!) A little Satin Stitched Gumball Green ribbon finished it off. Oh! And the ribbon is on promotion this month! With every $50 spent you get to pick on e of the 5 Stitched Satin Ribbons for free! ... Naturally I had to get in on THAT deal (would have been a lot cheaper if I would have just bought the darned ribbon *lol*).
That's it! A quick and easy project for back-to-school. I made this card for each of the girls and for the teachers at school. I made up a tray of sliced apples and dip and took it in for them to snack on today. The dip is a recipe I found on Pinterest but actually, I first found it at CONVENTION, of all places! I can't remember which presenter shared the recipe but I tried it and it's a keeper! Here it is:
Right - I'm feeling a little perkier now so off to do a little more work, a little tidying and then off to pick up my Poppets. I hope your day was filled with more smiles than tears. When the wee ones get home give them an extra long hug - the days sometimes feel long but the years go so fast.
Have a stampy day :)
Tam
Sigh ...
Right - enough of that before I start bawling! On to crafts!
I made it downstairs yesterday afternoon to work on my 1st Day of School cards ... nothing like leaving those to the last minute, eh? *lol* Happily it took me all of about 15 minutes to put it together. Yep ... I'm getting much better at the quick and easy!
Fairly appropriate, no? 4 apples (from the retired Tart & Tangy) stamped in Crumb Cake, Real Red and Gumball green. (I got the color combination from my Color Coach ... again! Where would I be without that tool?? I honestly use it on about 90% of my cards ... no word of a lie!) The alphabet and "first day of school" are from the retired "First Day" set (I think that's what it's called!) A little Satin Stitched Gumball Green ribbon finished it off. Oh! And the ribbon is on promotion this month! With every $50 spent you get to pick on e of the 5 Stitched Satin Ribbons for free! ... Naturally I had to get in on THAT deal (would have been a lot cheaper if I would have just bought the darned ribbon *lol*).
That's it! A quick and easy project for back-to-school. I made this card for each of the girls and for the teachers at school. I made up a tray of sliced apples and dip and took it in for them to snack on today. The dip is a recipe I found on Pinterest but actually, I first found it at CONVENTION, of all places! I can't remember which presenter shared the recipe but I tried it and it's a keeper! Here it is:
- 1 brick or Philly Cream Cheese
- 1/2 cup of brown sugar
Right - I'm feeling a little perkier now so off to do a little more work, a little tidying and then off to pick up my Poppets. I hope your day was filled with more smiles than tears. When the wee ones get home give them an extra long hug - the days sometimes feel long but the years go so fast.
Have a stampy day :)
Tam
Monday, September 3, 2012
Frame It!
Happy Holiday Monday!
I gotta admit ... I'm feeling just a little bit guilty that I'm not out and baout having fun with the girls today ... the last day of summer break. Maybe a bit later I'll jump rope with them or something. It's pretty windy out today ... and Craig is on call for work so our options are a bit limited. They are out playing at the moment so I thought I'd do my Monday post ... chances are it's gunna be a looooooong one, so get comfy!
As you know there is nothing I love more than a rainy Sunday. They bring such fond memories for me. When I was a kid rainy Sunday's meant I would spend HOURS at the kitchen table doing puzzles or my paint-by-number. Mom would be putzing in the kitchen making a lovely Sunday dinner complete with dessert and the house was just calm and happy. During the summer rules were relaxed a little but come fall the old "everyone has to be home for dinner" applied and always stuck. As I got older I still loved my Sundays ... especially in the fall. When I moved out I would always go home for Sunday dinner (yes, it was the only time I got a decent meal and then I'd get leftovers to get me through the week so I didn't starve!). When I was in University I would always head to school to study on the weekends but on Sundays I ALWAYS left by 2:00 pm to be home to watch football with my dad. Well ... he would watch football ... I would knit or crochet and just listen to it ... and just "be" with my dad. Such great memories. So yep - I love a cold, rainy (or snowy) Sunday. Yesterday was bliss. I walked the dog and got a good, healthy glow and chill ... then took a hot shower. Craig headed to the store for me and picked up all the fixin's for Sunday Roast Beef dinner. I invited Ma and Pa over for dinner ... and I even made dessert (just like Mom used to). While dinner was cooking, and before my parents showed up I hit the craft room. Yes ... I have about projects I needed to work on but yesterday was about doing what a WANTED to do, not what I HAD to do. MAN did I have fun!! I have been wanting to make these projects for MONTHS ... yesterday was the day! So ... without further adeau ... I give you ... my Sunday Fun Projects ...
First up is a project I started back in May. Here it is:
This is a framed birthday card I made for my Australian friend, Laura. I posted about her before ... she is a dear friend who I have knows since I was about 8 years old ... our families were / are very close, spending MANY holiday dinners together. Laura now lives in Australia with her beautiful family. Last year she launched her own company "Page Buddies" which make and sell accessories for books - primarily magnetic book marks. You can check out their offering here: http://www.pagebuddy.com/ I have two of their bookmarks and love them! This little reindeer is one of the characters on one of their bookmarks and my personal favorite. I just HAD to make her a 1st Birthday present to mark the 1 year point. I blew up a picture of this little guy and then cut him out of Crumb Cake Card stock. I had fun adding the Real Red Nose, Polka Dot Parade tie and Daffodil Delight bell. While I love it in a frame I figure it will take a lot longer, and a lot more money to mail it in a frame so I will likely turn it into a card for her. It was a lot of fun to make and was on my To-Do list for months!!!
Once I dug out the frame for the Page Buddy project I figured I'd work on some other frame projects I've wanted to do forever. I had so much fun! I had stocked up on a few frames (me? stock up on stuff? how unusual?! *lol*) to use for little noted to my family. I have seen quite a few project on Pinterest using frames as dry erase boards ... that got me thinking about all SORTS of fun projects! Here is the first frame I made for my girls:
I don't know if you can read it ... the words are from the retired set "Three Little Words". I bought the frame at Winners and then just cut some whisper white for the insert. I stamped the sentiment and butterfly (from Papillon Potpourri) in Whisteria Wonder. I plan to put it in their bathroom with little notes to them ... like ...
Or ...
Hee hee. Yes, the message is on glass, written with a dry erase marker so it just wipes off ... so fun! I made the mistake of making a frame with a PLASTIC frame ... nope - doesn't wip off those *lol*
Here is another one I made. I didn't realize this paper was retired. It is the Attic Boutique from the Occasions Mini last year ... I thought it carried over to the new catty but I was wrong :( Too bad ... I just LOVE this DSP ... of course I loved it so much I never USED it! (I'm sure everyone knows how THAT goes *lol*) Here it is:
LOVE IT!! This is a different type of frame that I bought at Dollarama ...
I turned it on it's side and it still stands up. I stamped Three Little Words in Soft Sued and then made a paper flower with Soft Suede, Very Vanilla, So Saffron and Bashful Blue Scalloped Circles with an antique brad in the middle. I added a little Crochet Trim to finish it off. I LOVE it! Does anyone follow Kimberley Van Diepen's blog? This just screams her style to me! Check out here work at www.stampinbythesa.com
Finally ... my all time favorite! My friend Peggy L had given me a post-it-note holder made from a similar frame MONTHS ago. Naturally I ran right out and bought 12 frames to make themself ... and then they sat there ever since. No longer! I LOVE this little project and plan to make 10 more for hostess gifts and door prizes later today:
LOVE LOVE LOVE it! I turned the frame upside down which poses a problem because the glass keeps sliding down. How to stop that? Tie it with a piece of ribbon! This literally took me 3 minutes to make from start to finish! I cut a piece of retired Mocha Morning DSP (yes, I now have 5 packs being hoarded in my basement *lol*), tied a piece of ribbon around it (satin), put some snail on the back of a pack of post-it-notes and stamped it with Flowering Flourishes and "A Note of Thanks" (retired). The pen just sits on top of the the post-it-notes. Yep ... LOVE it! I had to laugh, though ... when I showed my family my works of art they were more than a littel underwhelmed ... they just didn't "get" it .... oh well, I had fun!
I think I'll stop there for now. I have a tutorial on how to make these cute little Halloween boxes ... but there are 11 pictures and will take me another half hour to post ... so I'll do that another day. I think I better get cracking on those First-Day-Of-School cards for the girls ... and the teachers. Tomorrow IS the big day!
Enjoy your day off and hopefully you'll have a stampy day :)
Tam
I gotta admit ... I'm feeling just a little bit guilty that I'm not out and baout having fun with the girls today ... the last day of summer break. Maybe a bit later I'll jump rope with them or something. It's pretty windy out today ... and Craig is on call for work so our options are a bit limited. They are out playing at the moment so I thought I'd do my Monday post ... chances are it's gunna be a looooooong one, so get comfy!
As you know there is nothing I love more than a rainy Sunday. They bring such fond memories for me. When I was a kid rainy Sunday's meant I would spend HOURS at the kitchen table doing puzzles or my paint-by-number. Mom would be putzing in the kitchen making a lovely Sunday dinner complete with dessert and the house was just calm and happy. During the summer rules were relaxed a little but come fall the old "everyone has to be home for dinner" applied and always stuck. As I got older I still loved my Sundays ... especially in the fall. When I moved out I would always go home for Sunday dinner (yes, it was the only time I got a decent meal and then I'd get leftovers to get me through the week so I didn't starve!). When I was in University I would always head to school to study on the weekends but on Sundays I ALWAYS left by 2:00 pm to be home to watch football with my dad. Well ... he would watch football ... I would knit or crochet and just listen to it ... and just "be" with my dad. Such great memories. So yep - I love a cold, rainy (or snowy) Sunday. Yesterday was bliss. I walked the dog and got a good, healthy glow and chill ... then took a hot shower. Craig headed to the store for me and picked up all the fixin's for Sunday Roast Beef dinner. I invited Ma and Pa over for dinner ... and I even made dessert (just like Mom used to). While dinner was cooking, and before my parents showed up I hit the craft room. Yes ... I have about projects I needed to work on but yesterday was about doing what a WANTED to do, not what I HAD to do. MAN did I have fun!! I have been wanting to make these projects for MONTHS ... yesterday was the day! So ... without further adeau ... I give you ... my Sunday Fun Projects ...
First up is a project I started back in May. Here it is:
This is a framed birthday card I made for my Australian friend, Laura. I posted about her before ... she is a dear friend who I have knows since I was about 8 years old ... our families were / are very close, spending MANY holiday dinners together. Laura now lives in Australia with her beautiful family. Last year she launched her own company "Page Buddies" which make and sell accessories for books - primarily magnetic book marks. You can check out their offering here: http://www.pagebuddy.com/ I have two of their bookmarks and love them! This little reindeer is one of the characters on one of their bookmarks and my personal favorite. I just HAD to make her a 1st Birthday present to mark the 1 year point. I blew up a picture of this little guy and then cut him out of Crumb Cake Card stock. I had fun adding the Real Red Nose, Polka Dot Parade tie and Daffodil Delight bell. While I love it in a frame I figure it will take a lot longer, and a lot more money to mail it in a frame so I will likely turn it into a card for her. It was a lot of fun to make and was on my To-Do list for months!!!
Once I dug out the frame for the Page Buddy project I figured I'd work on some other frame projects I've wanted to do forever. I had so much fun! I had stocked up on a few frames (me? stock up on stuff? how unusual?! *lol*) to use for little noted to my family. I have seen quite a few project on Pinterest using frames as dry erase boards ... that got me thinking about all SORTS of fun projects! Here is the first frame I made for my girls:
I don't know if you can read it ... the words are from the retired set "Three Little Words". I bought the frame at Winners and then just cut some whisper white for the insert. I stamped the sentiment and butterfly (from Papillon Potpourri) in Whisteria Wonder. I plan to put it in their bathroom with little notes to them ... like ...
Or ...
Hee hee. Yes, the message is on glass, written with a dry erase marker so it just wipes off ... so fun! I made the mistake of making a frame with a PLASTIC frame ... nope - doesn't wip off those *lol*
Here is another one I made. I didn't realize this paper was retired. It is the Attic Boutique from the Occasions Mini last year ... I thought it carried over to the new catty but I was wrong :( Too bad ... I just LOVE this DSP ... of course I loved it so much I never USED it! (I'm sure everyone knows how THAT goes *lol*) Here it is:
LOVE IT!! This is a different type of frame that I bought at Dollarama ...
I turned it on it's side and it still stands up. I stamped Three Little Words in Soft Sued and then made a paper flower with Soft Suede, Very Vanilla, So Saffron and Bashful Blue Scalloped Circles with an antique brad in the middle. I added a little Crochet Trim to finish it off. I LOVE it! Does anyone follow Kimberley Van Diepen's blog? This just screams her style to me! Check out here work at www.stampinbythesa.com
Finally ... my all time favorite! My friend Peggy L had given me a post-it-note holder made from a similar frame MONTHS ago. Naturally I ran right out and bought 12 frames to make themself ... and then they sat there ever since. No longer! I LOVE this little project and plan to make 10 more for hostess gifts and door prizes later today:
LOVE LOVE LOVE it! I turned the frame upside down which poses a problem because the glass keeps sliding down. How to stop that? Tie it with a piece of ribbon! This literally took me 3 minutes to make from start to finish! I cut a piece of retired Mocha Morning DSP (yes, I now have 5 packs being hoarded in my basement *lol*), tied a piece of ribbon around it (satin), put some snail on the back of a pack of post-it-notes and stamped it with Flowering Flourishes and "A Note of Thanks" (retired). The pen just sits on top of the the post-it-notes. Yep ... LOVE it! I had to laugh, though ... when I showed my family my works of art they were more than a littel underwhelmed ... they just didn't "get" it .... oh well, I had fun!
I think I'll stop there for now. I have a tutorial on how to make these cute little Halloween boxes ... but there are 11 pictures and will take me another half hour to post ... so I'll do that another day. I think I better get cracking on those First-Day-Of-School cards for the girls ... and the teachers. Tomorrow IS the big day!
Enjoy your day off and hopefully you'll have a stampy day :)
Tam
Subscribe to:
Posts (Atom)